How Cleanup logs Exchange 2013/2016/2019
Thanks to: https://www.alitajran.com/
Starting from Exchange 2013 and higher, logs are taking up more space on the Windows Server. This is when cleanup logs Exchange 2013/2016/2019 script plays an important role. Clear Exchange logs with PowerShell and get free space on the Exchange Server. These logs are NOT database logs! You can safely delete these logs. In fact, I recommend you to delete them.
Logs are great when you need more information and want to have a look into it when you are having issues. Exchange Servers are filling up easily with all these logs. The best way is to clear the logs because you need to free up some size on the disk. The script in this article is my edit to the original script from MVP Edward van Biljon. You can download the official script from Microsoft Technet.
Prepare the cleanup logs Exchange script
Copy the following code and paste it in Notepad. Save the file type as CleanupLogs.ps1. You can also download the CleanupLogs.ps1 script (direct link). If it does not give you a prompt to save the file, right-click on CleanupLogs.ps1 and click save link as. You should be able to save the script.
1 2 3 4 5 6 7 8 9 10 11 12 13 14 15 16 17 18 19 20 21 22 23 24 25 26 27 28 29 30 31 32 33 34 35 36 37 | # Set execution policy if not set $ExecutionPolicy = Get-ExecutionPolicy if ($ExecutionPolicy -ne "RemoteSigned") { Set-ExecutionPolicy RemoteSigned -Force } # Cleanup logs older than the set of days in numbers $days = 2 # Path of the logs that you like to cleanup $IISLogPath = "C:\inetpub\logs\LogFiles\" $ExchangeLoggingPath = "C:\Program Files\Microsoft\Exchange Server\V15\Logging\" $ETLLoggingPath = "C:\Program Files\Microsoft\Exchange Server\V15\Bin\Search\Ceres\Diagnostics\ETLTraces\" $ETLLoggingPath2 = "C:\Program Files\Microsoft\Exchange Server\V15\Bin\Search\Ceres\Diagnostics\Logs\" # Clean the logs Function CleanLogfiles($TargetFolder) { Write-Host -Debug -ForegroundColor Yellow -BackgroundColor Cyan $TargetFolder if (Test-Path $TargetFolder) { $Now = Get-Date $LastWrite = $Now.AddDays(-$days) $Files = Get-ChildItem $TargetFolder -Recurse | Where-Object { $_.Name -like "*.log" -or $_.Name -like "*.blg" -or $_.Name -like "*.etl" } | Where-Object { $_.lastWriteTime -le "$lastwrite" } | Select-Object FullName foreach ($File in $Files) { $FullFileName = $File.FullName Write-Host "Deleting file $FullFileName" -ForegroundColor "yellow"; Remove-Item $FullFileName -ErrorAction SilentlyContinue | out-null } } Else { Write-Host "The folder $TargetFolder doesn't exist! Check the folder path!" -ForegroundColor "red" } } CleanLogfiles($IISLogPath) CleanLogfiles($ExchangeLoggingPath) CleanLogfiles($ETLLoggingPath) CleanLogfiles($ETLLoggingPath2) |
Make sure that you change line 8. At the moment it is showing $days=2. That means it will cleanup logs from the Exchange Servers that are older than 2 days.
If you have changed the path of the Exchange configuration, change the path in the line 11,12,13, and 14.
Save the file on the Exchange Server in the following path C:\scripts\. Give it the name CleanupLogs.ps1
Give your account permission access to the below four folders. If the script does not have permission, it will not cleanup logs in that folder. I recommend making a service account in Active Directory. Give the service user account read/write permission on the below four folders.
1 2 3 4 | C:\inetpub\logs\LogFiles\ C:\Program Files\Microsoft\Exchange Server\V15\Logging\ C:\Program Files\Microsoft\Exchange Server\V15\Bin\Search\Ceres\Diagnostics\ETLTraces\ C:\Program Files\Microsoft\Exchange Server\V15\Bin\Search\Ceres\Diagnostics\Logs\ |
Run the cleanup logs Exchange script
Before running the cleanup logs script
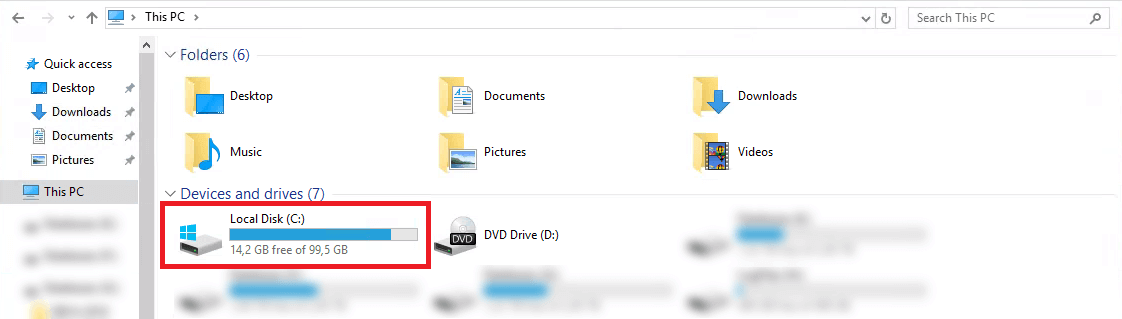
Before you run the script, have a look at how much free space you have on the drive. See the before cleanup screen.
Run the script as Administrator. Right-click the file CleanupLogs.ps1 and click on Run with PowerShell. A PowerShell window will show up and the script is cleaning up the logs. Wait till the PowerShell window disappears from the screen. It means that the script finished.
After running the cleanup logs script
Have a look again at how much free space you have on the drive. See the after cleanup screen.
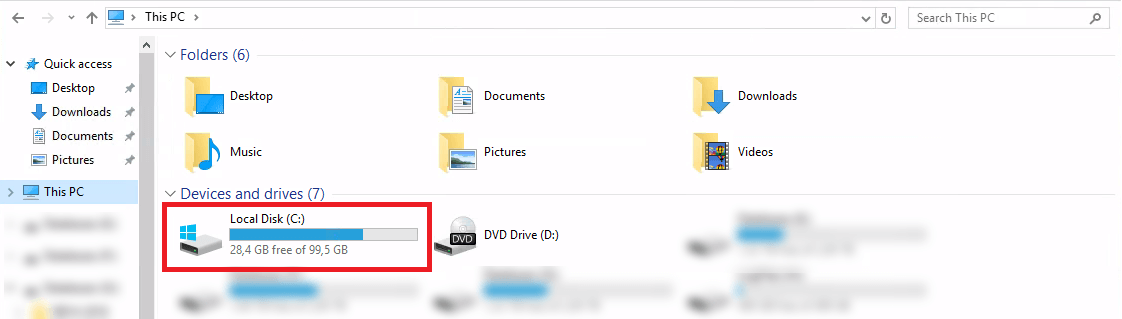
The script did cleanup 14GB of the Exchange logs. Did the cleanup logs Exchange script help you out?
Cleanup Exchange logs automatically with scheduled task.
How to combine PowerShell with a scheduled task to cleanup Exchange logs automatically? Why do we want to delete Exchange logs automatically? I always say that if you can automate the process, you should do it. In this article, you will learn how to clear Exchange logs automatically with a scheduled task.
Before creating the cleanup Exchange logs scheduled task
Download the CleanupLogs.ps1 script and place it in the C:\Scripts\ folder. Create a scripts folder if you don’t have one in the C:\ drive. Did you install Exchange in a different directory than the default path? Change the path in the script. Read more about the script in the article Cleanup logs Exchange 2013/2016/2019.
Automate the cleanup Exchange logs with task scheduler
After we confirmed that the CleanupLogs.ps1 script is in place, we can start automating the cleanup logs Exchange script.
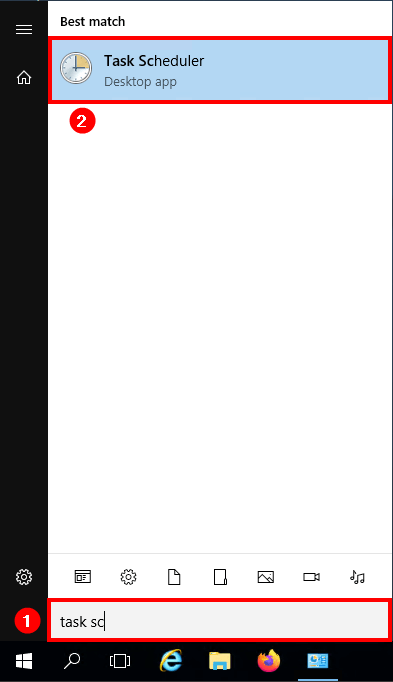
Start Task Scheduler.
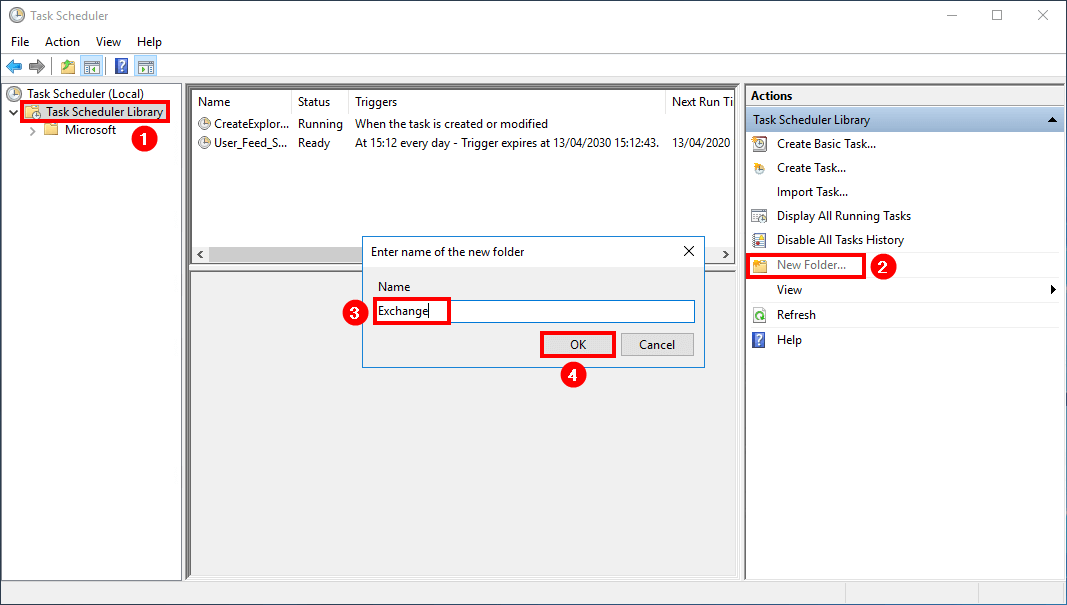
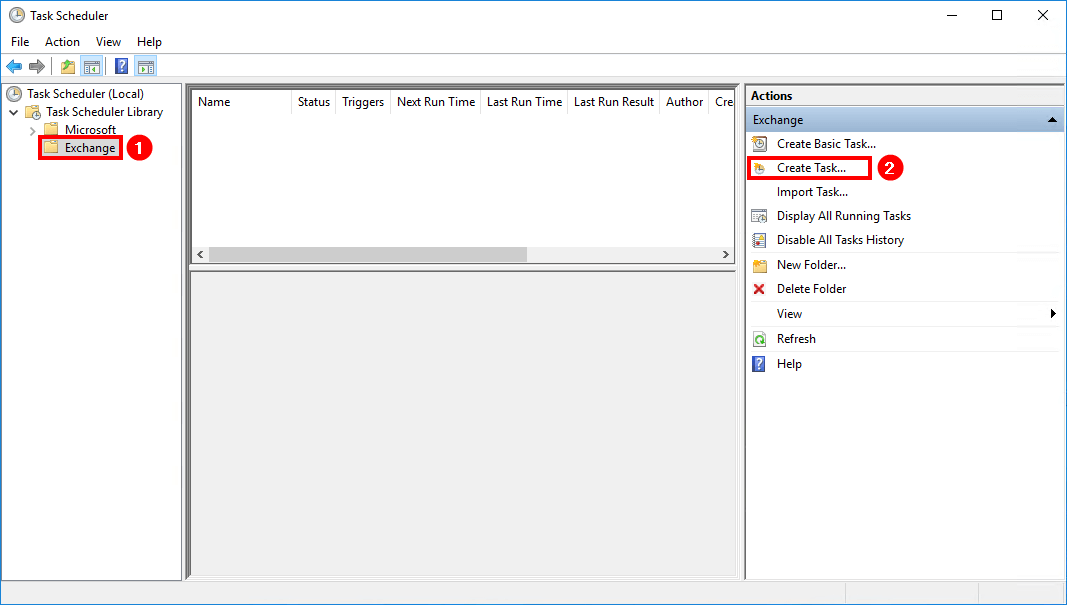
Click the Task Scheduler Library and click New folder… Name the folder Exchange and click OK.
Click the created Exchange folder. Click Create Task…
We have three tabs that we are going to fill in. The tabs are General, Triggers, and Actions.
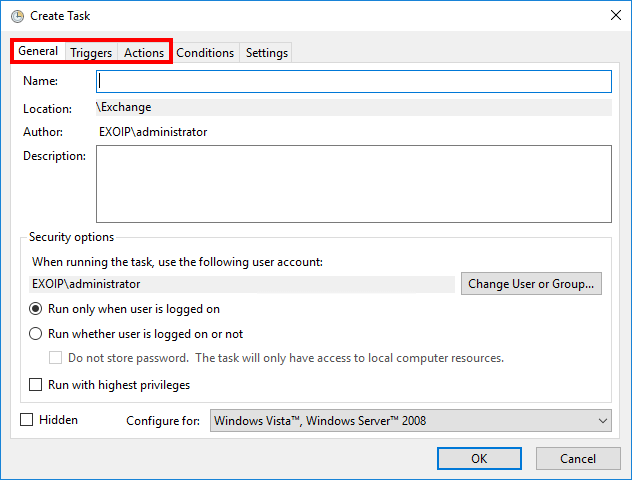
We start with the first tab General.
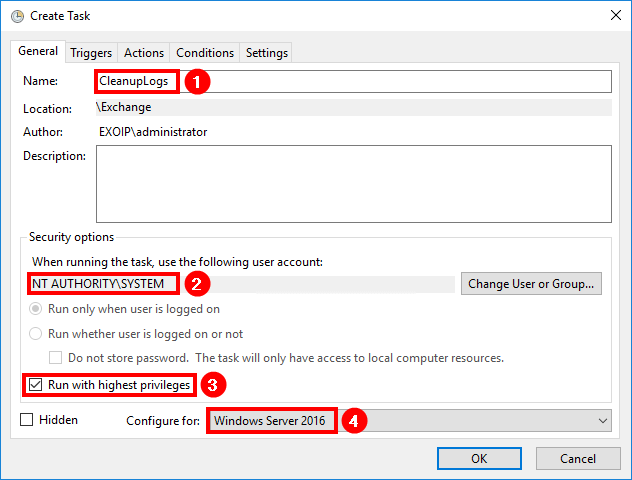
Give the task name CleanupLogs. Change user account to SYSTEM. Enable Run with highest privileges. Select Configure for Windows Server 2016 if you have a Windows Server 2016. If you have another Windows Server version running, select that.
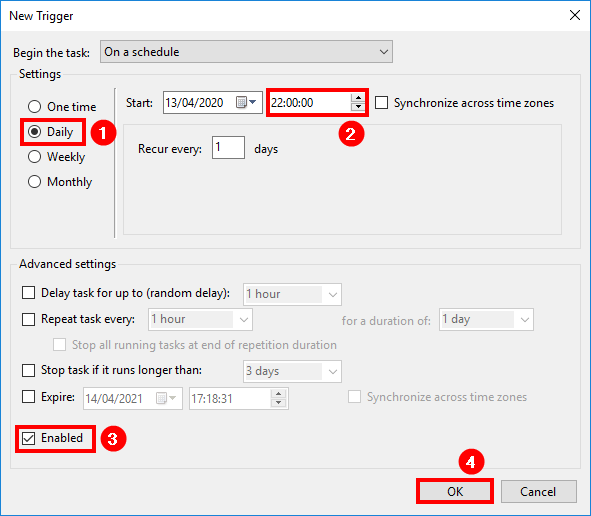
Click the tab Triggers. Click New…
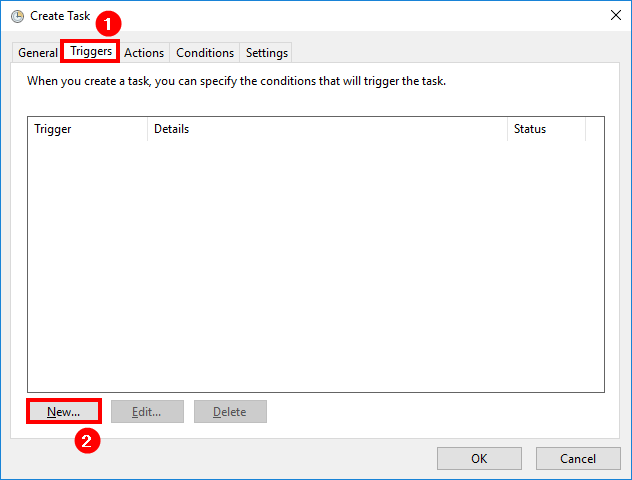
Select the settings Daily. Configure which time the script needs to start running. For example 22:00:00. Make sure that it’s Enabled and click OK.
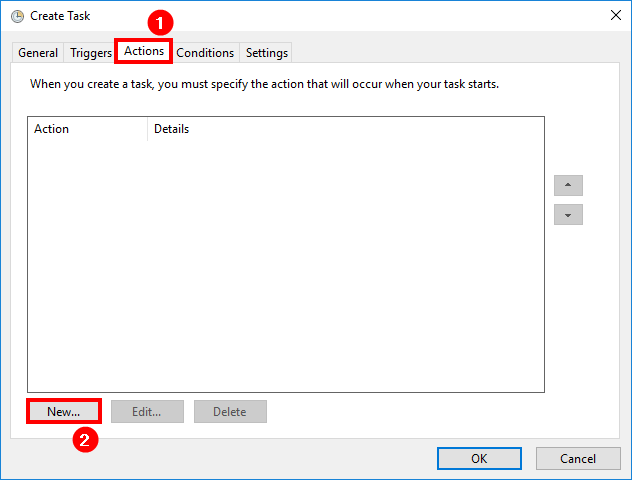
Click the tab Actions. Click New…
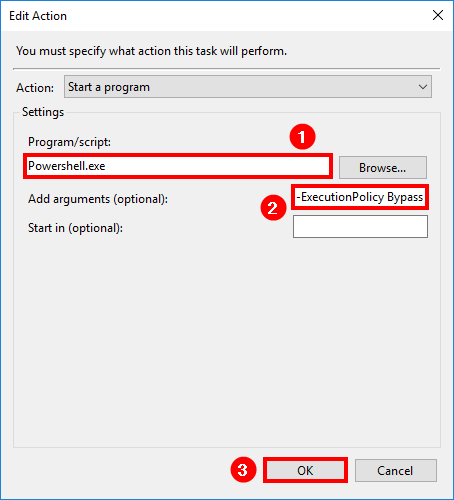
Make sure to copy and paste below to both of the fields.
Program/script: Powershell.exe
Add arguments (optional): -ExecutionPolicy Bypass C:\Scripts\CleanupLogs.ps1
Click OK.
Click OK.
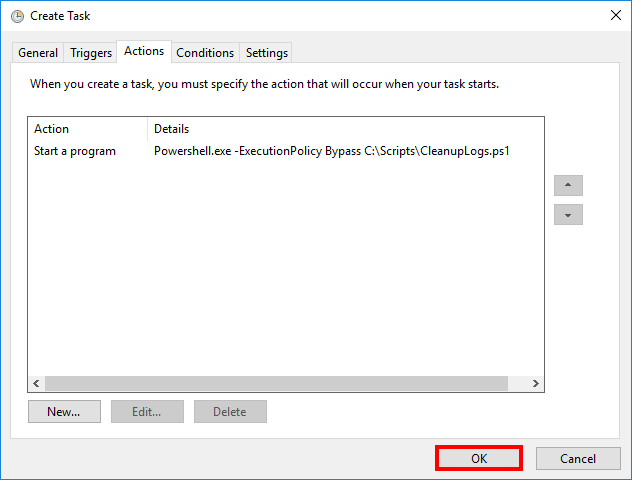
The clear Exchange logs task is scheduled. From now on, the task scheduler will automatically delete Exchange logs. In the next step, you will run the script to test if all is working great.
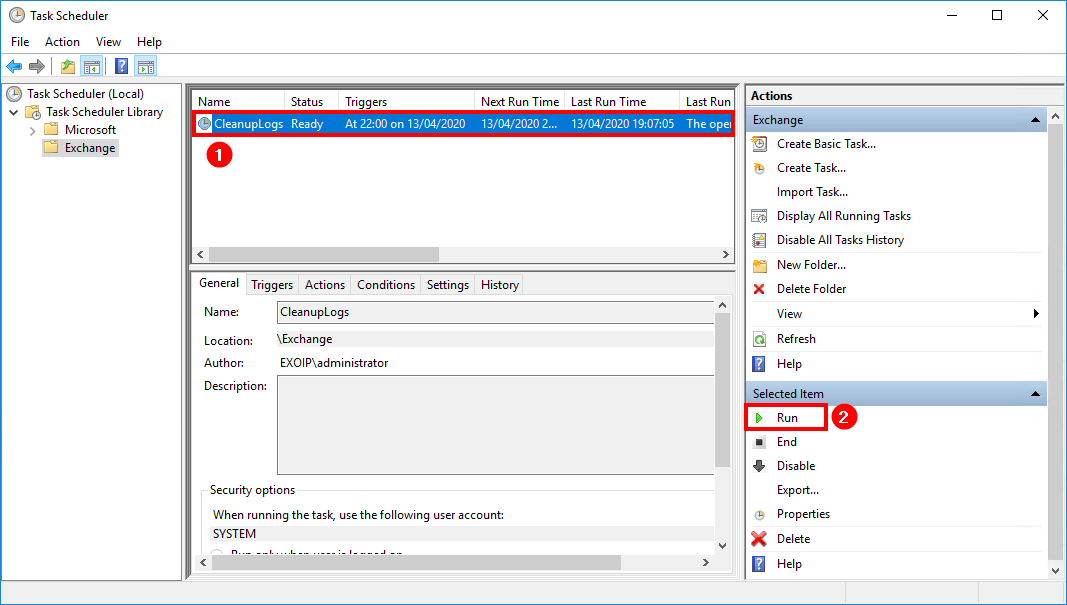
Run the cleanup Exchange logs task in task scheduler
Click the created task CleanupLogs and Click Run. The Last Run Result will show that The operation completed successfully. (0x0).
Make sure to check if the CleanupLogs task did clear the logs in the following folders.
1 2 3 4 | C:\inetpub\logs\LogFiles\ C:\Program Files\Microsoft\Exchange Server\V15\Logging\ C:\Program Files\Microsoft\Exchange Server\V15\Bin\Search\Ceres\Diagnostics\ETLTraces\ C:\Program Files\Microsoft\Exchange Server\V15\Bin\Search\Ceres\Diagnostics\Logs\ |
Conclusion
In this article, you learned how to cleanup Exchange logs automatically with a scheduled task. Make sure that you place the CleanupLogs.ps1 PowerShell script in the C:\scripts\ folder. Create a new task in the task scheduler. Run the task and check that it did cleanup the Exchange logs. From now on, the Exchange logs will delete automatically.


Comentarios
Publicar un comentario
Dime si la información de este blog te sirvio.