Installation Of Active Directory And DNS Services
Installation Of Active Directory And DNS Services
How to setup a Domain Controller? Setting up your first Domain Controller and installing Active Directory Domain Services (AD DS) on Windows Server is excellent to start managing the IT infrastructure. This article will show how to install AD DS and promote the server to Domain Controller.
Table of contents
Active Directory Domain Services
A server running the Active Directory Domain Services (AD DS) role is called a Domain Controller. It authenticates and authorizes all users and computers in a Windows domain type network, assigning and enforcing security policies for all computers and installing or updating software.
Setup a Domain Controller
There are three steps in total to setup a Domain Controller. The below step-by-step guide will ensure that you install and configure a Domain Controller.
Note: The steps will work for Windows Server 2012/2016/2019/2022.
Prerequisites
You should not immediately install the Active Directory Domain Services role on a Windows Server. Go through the below articles first to ensure that the Windows Server is ready:
Install Active Directory Domain Services (AD DS)
Follow the steps to install Active Directory Domain Services (AD DS) on Windows Server.
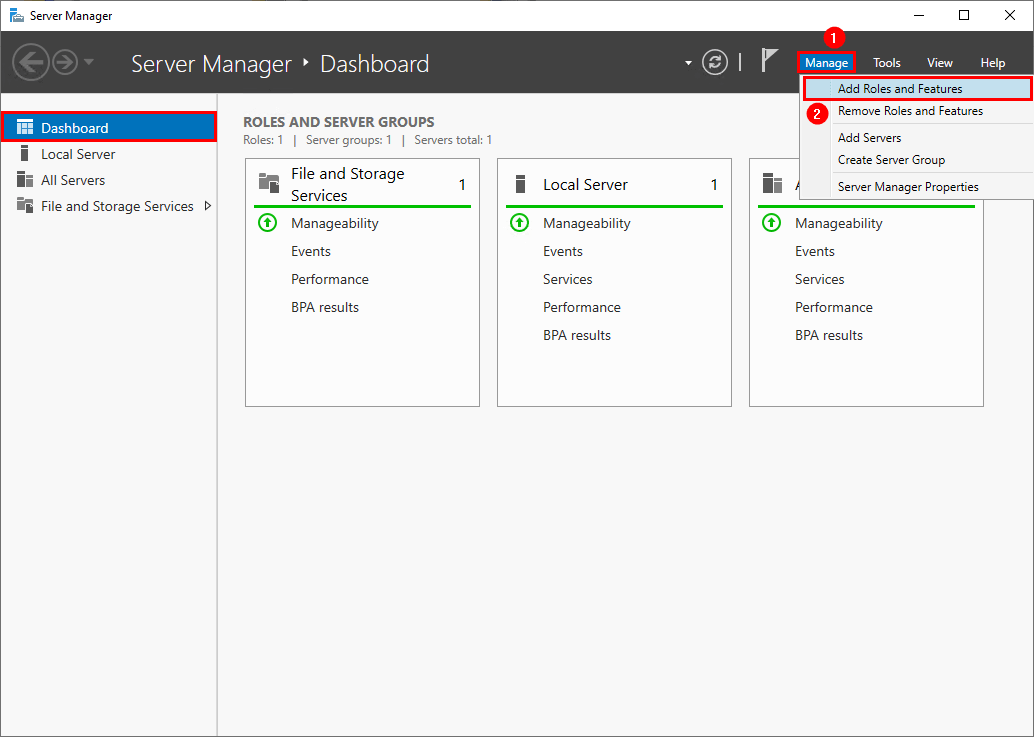
Start Server Manager. Go to Dashboard > Manage > Add Roles and Features.
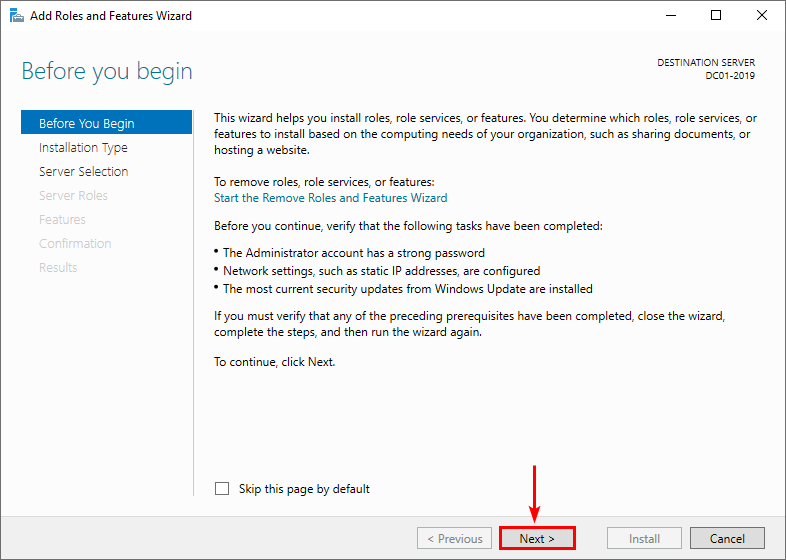
Click Next.
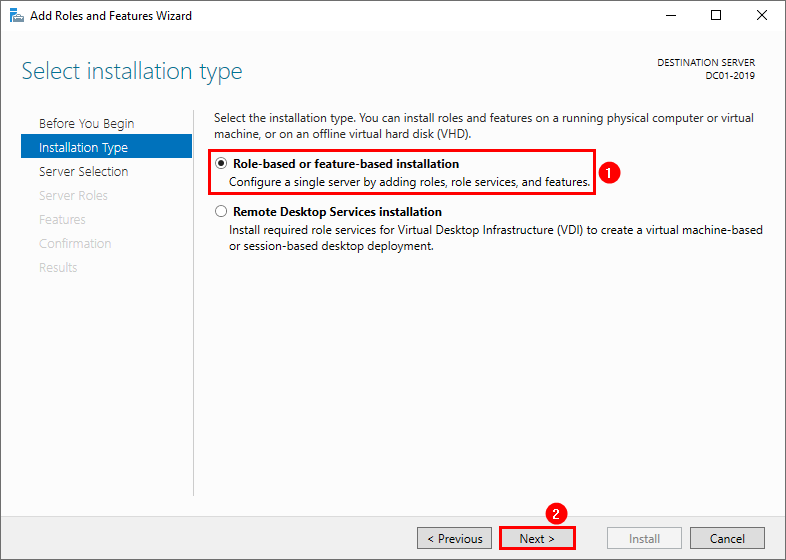
Select Role-based or feature-based installation. Click Next.
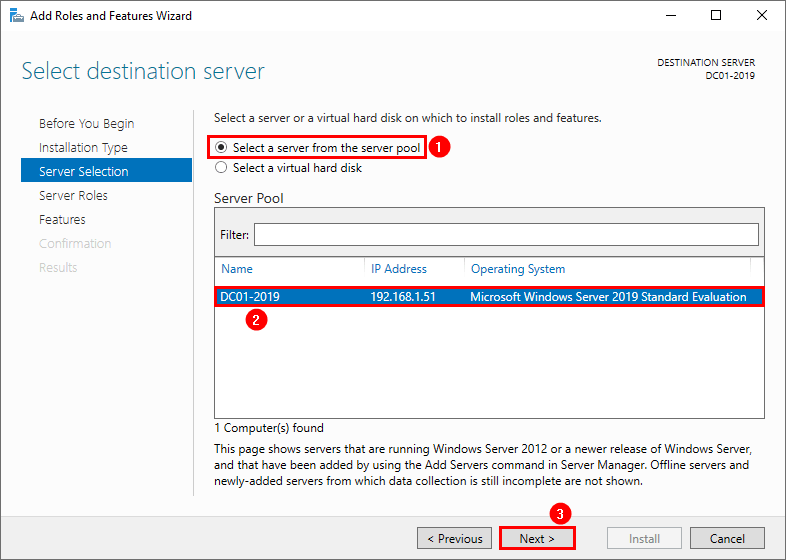
Select the server from the pool. Click on Next.
In our example, it’s Windows Server DC01-2019 with a fixed IP address 192.168.1.51.
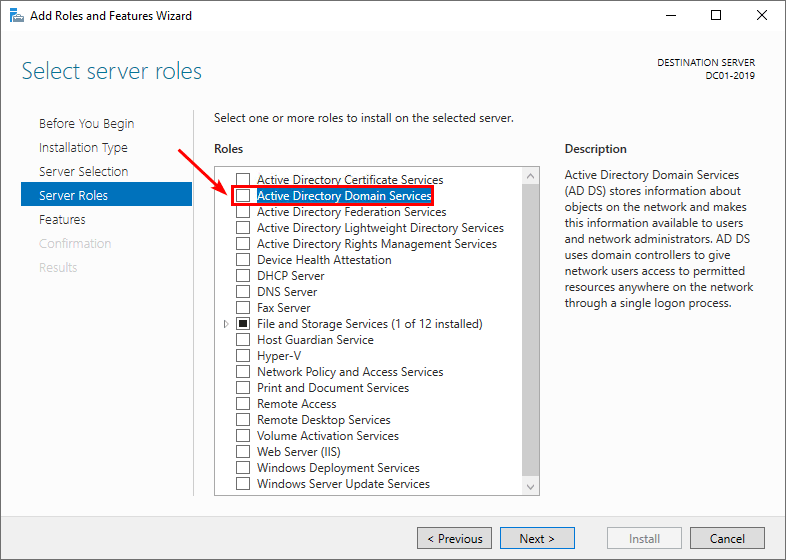
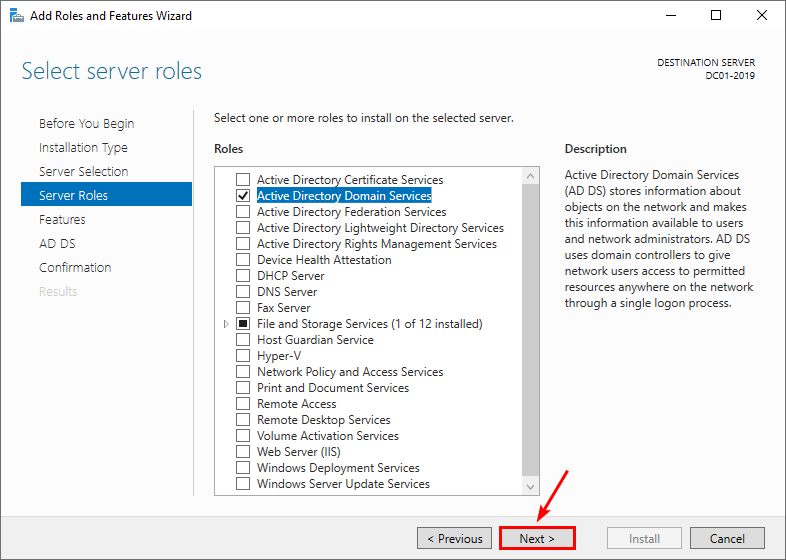
Check the checkbox Active Directory Domain Services.
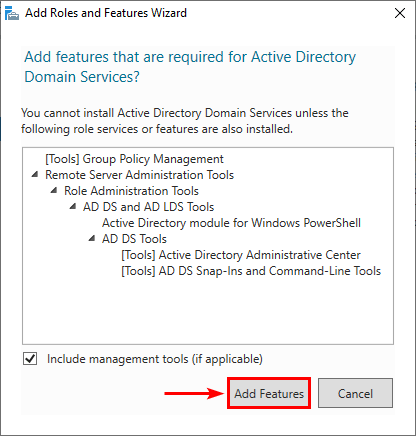
A window will show that it will add features that are required for Active Directory Domain Services. Click Add Features.
Click Next.
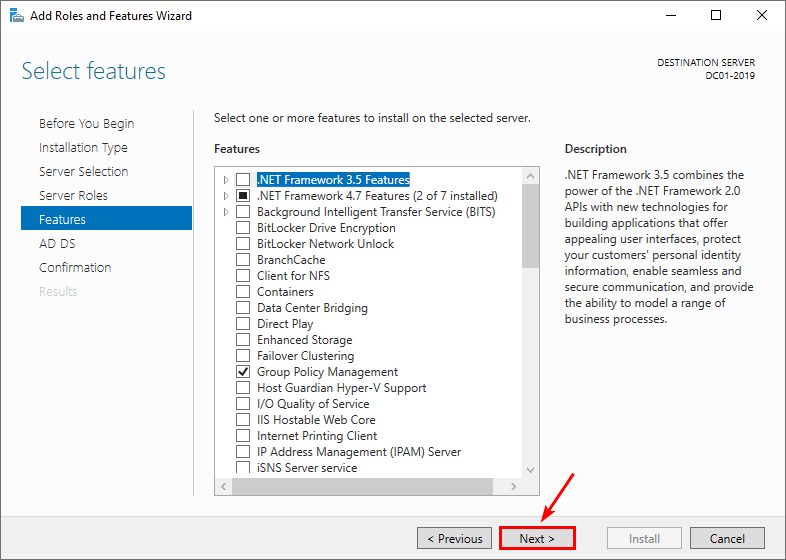
You don’t need to select any features. Click Next.
Proceed with Next.
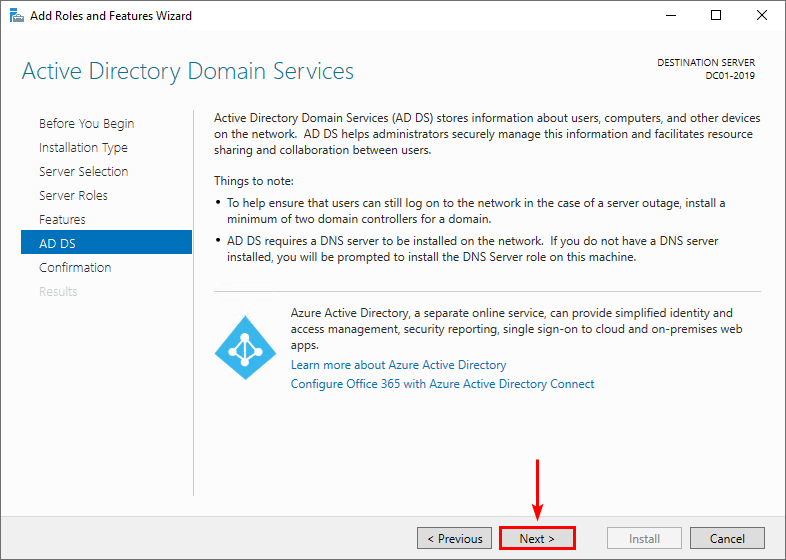
Click Install.
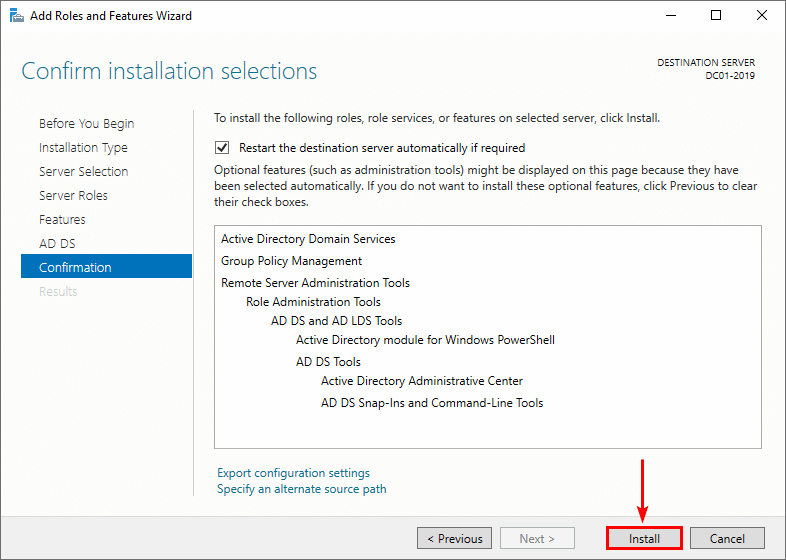
The installation will start.
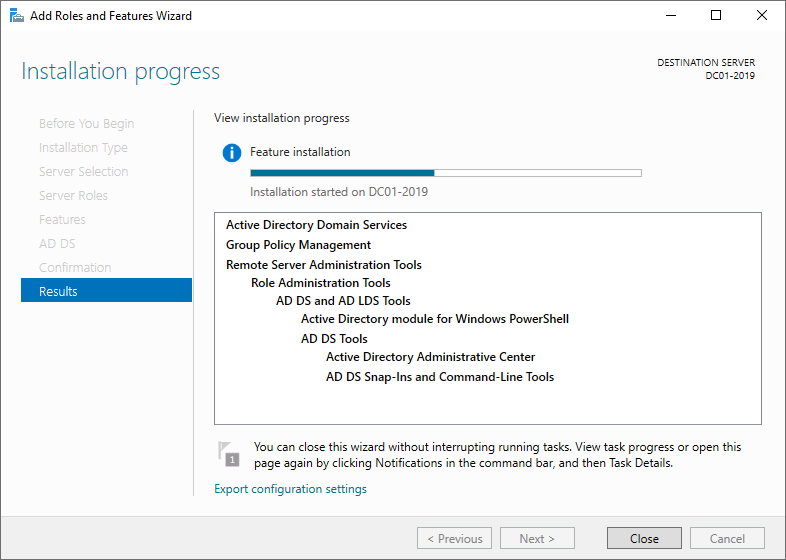
In the next step, we will promote the server to a Domain Controller.
Promote server to Domain Controller
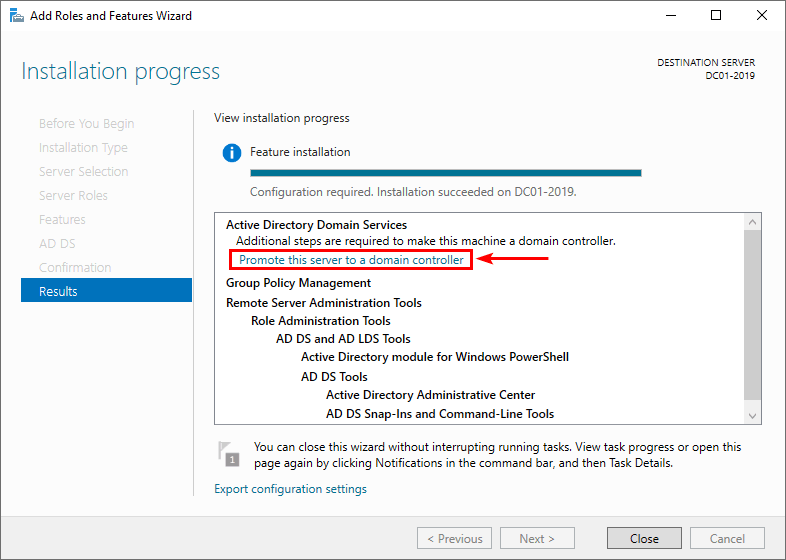
Now that the Active Directory Domain Services feature installation is completed on Windows Server, additional steps are required to make this machine a domain controller.
Click on Promote this server to a domain controller.
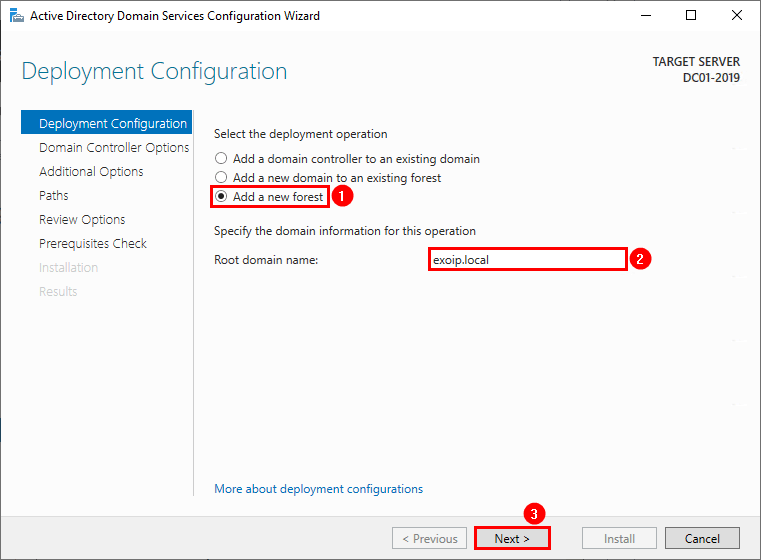
Select Add a new forest. Fill in the root domain. Click Next.
In our example, we will use the root domain exoip.local.
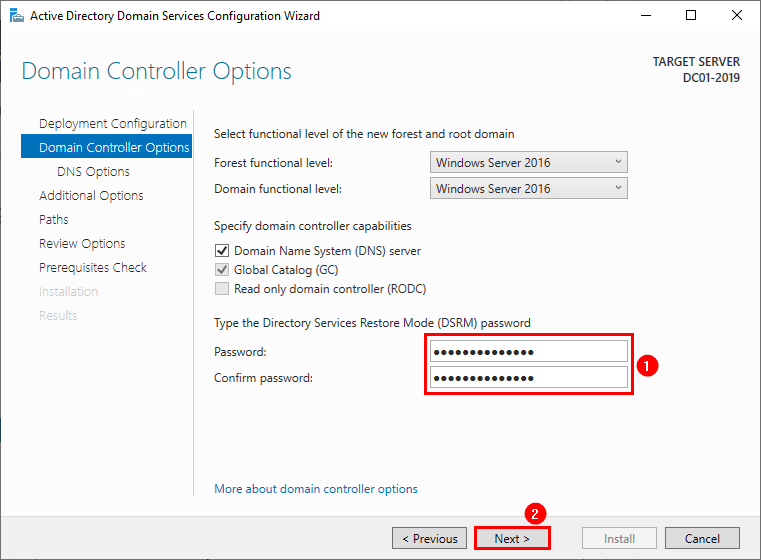
Type the Directory Services Restore Mode (DRSM) password twice. Click Next.
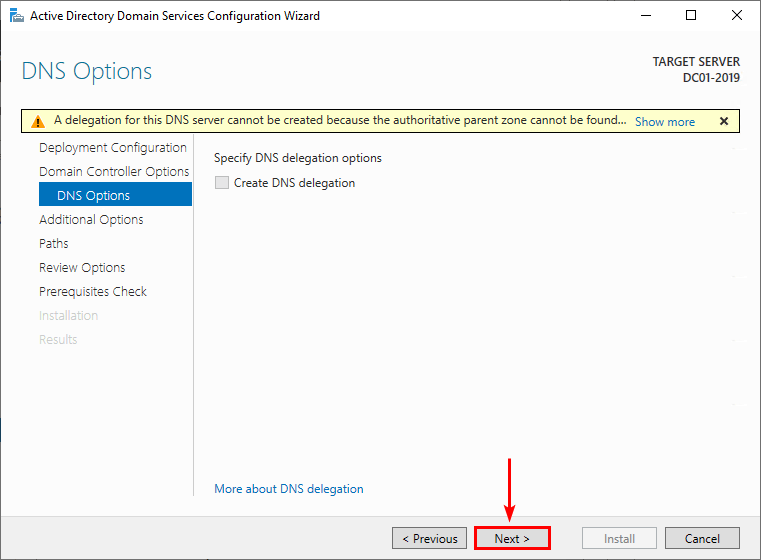
Ignore the delegation warning at the top. Click Next.
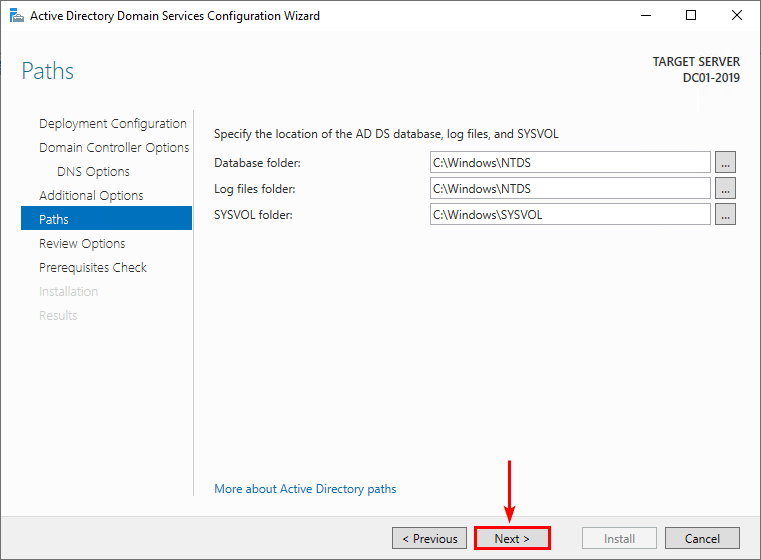
Click Next.
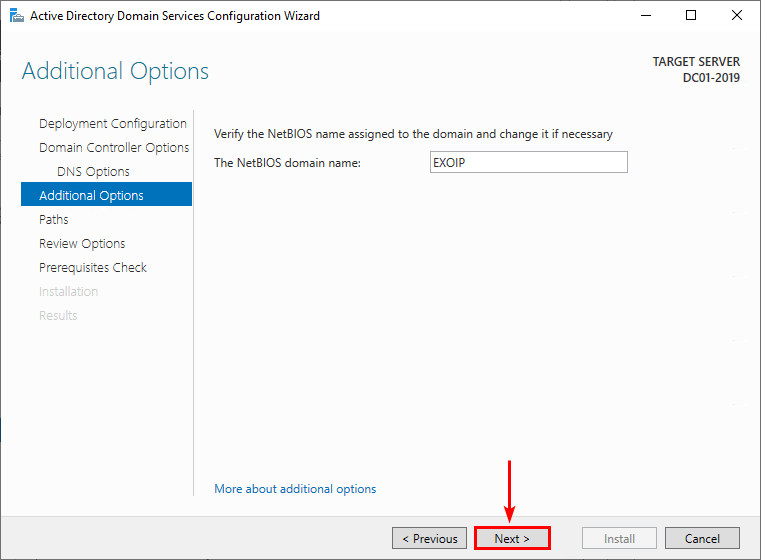
Click Next.
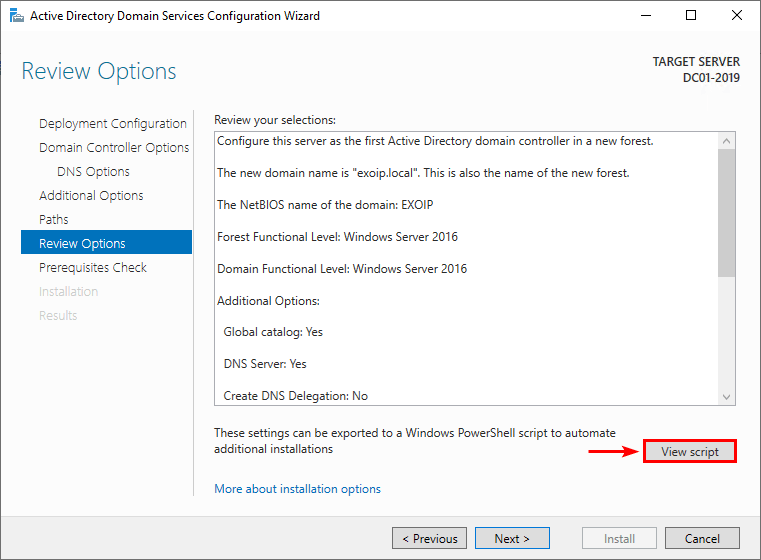
Click View script to see the Windows PowerShell script for automating the installation.
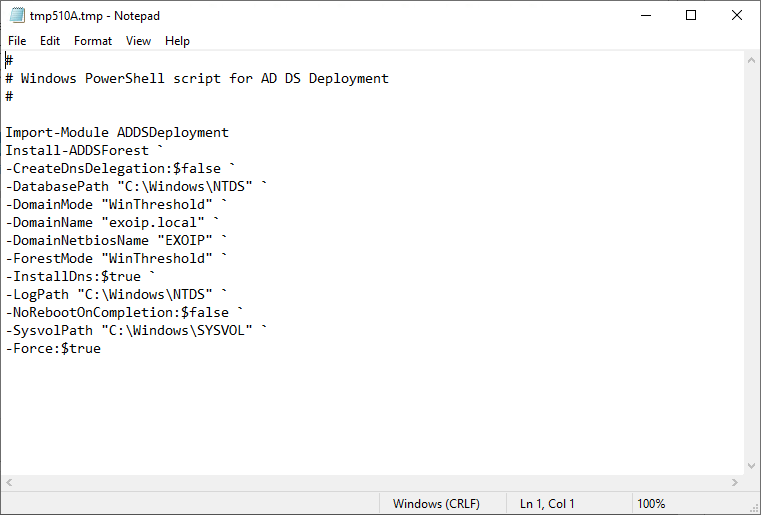
You can save the file as PowerShell script (.ps1) and use it the next time you want to install a Domain Controller. Or you can adjust the PowerShell script to your needs. This can save you time instead of using the Server Manager and going through all the steps.
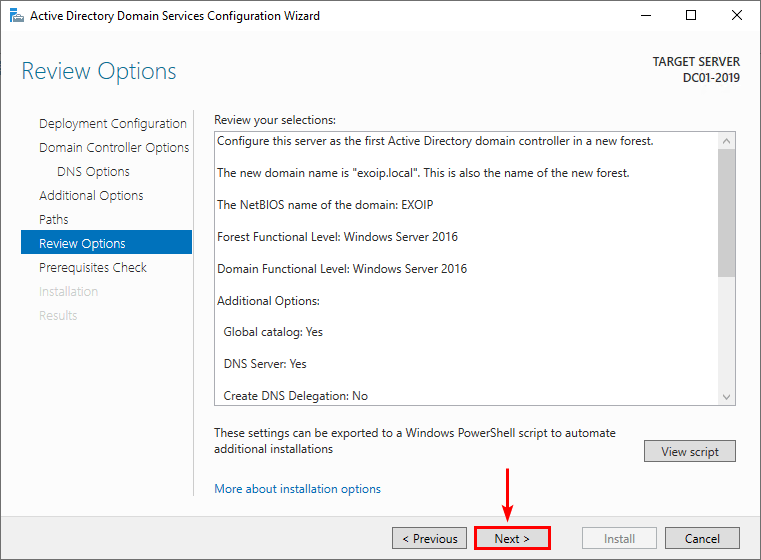
Click Next.
Click Install.
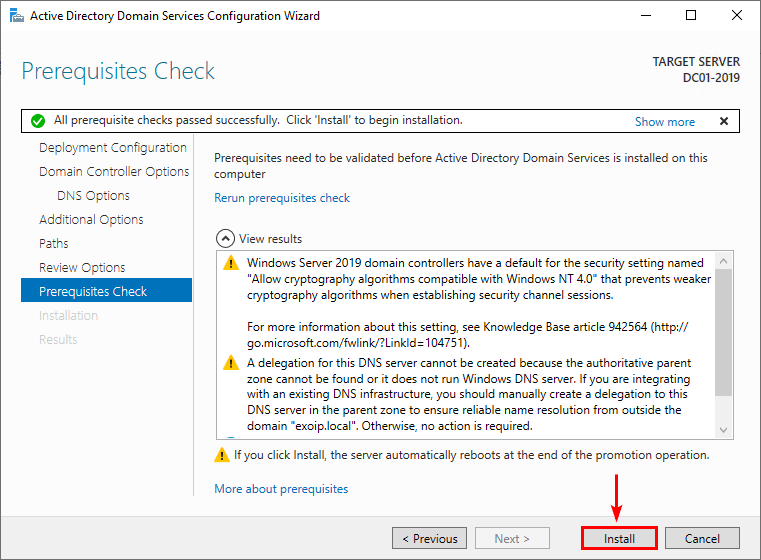
A reboot will automatically occur at the end of the promotion operation.
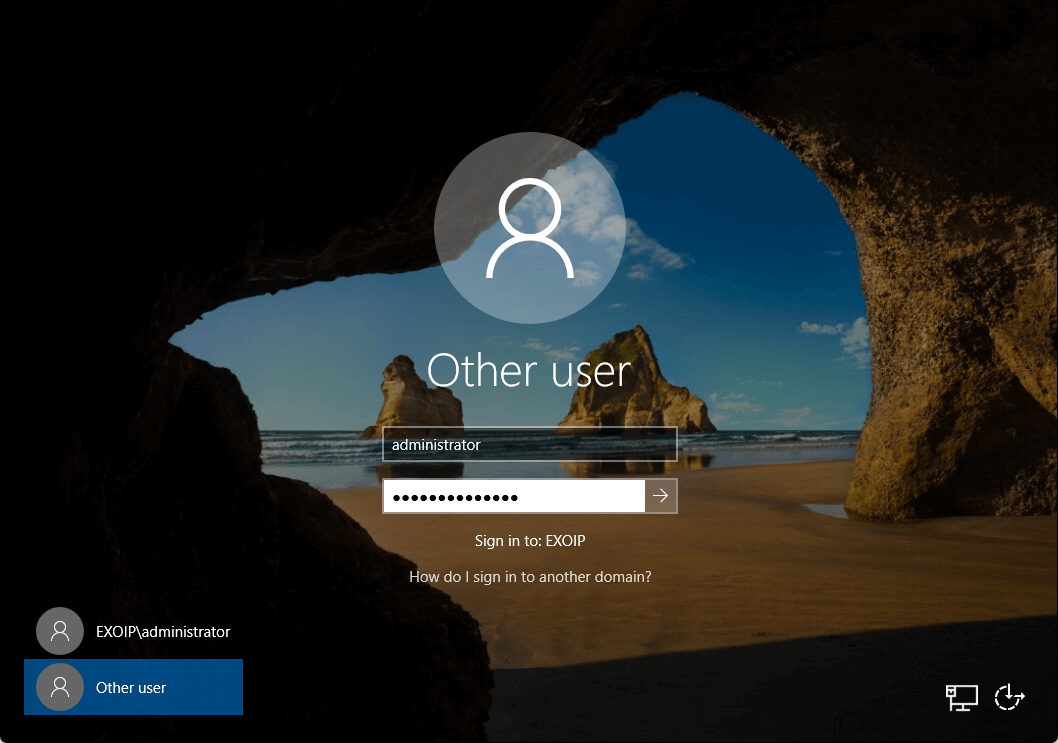
Sign in to domain
Type in the credentials to sign in to the domain. The password is the same that you used when you sign in to the local server before installing AD DS and promoting the server to Domain Controller.
That’s it!

Comentarios
Publicar un comentario
Dime si la información de este blog te sirvio.