Exchange Renew certificate in Exchange Hybrid
Thank to: https://www.alitajran.com/
How to renew a certificate in Exchange Hybrid? You have a new third-party certificate installed on the Exchange Server. Now that you finished that task, you like to remove the old certificate. But you get a message that these certificates are tagged with the Outbound to Office 365 send connector. Why is this happening, and what is the solution?
Table of contents
Invalid Exchange certificate
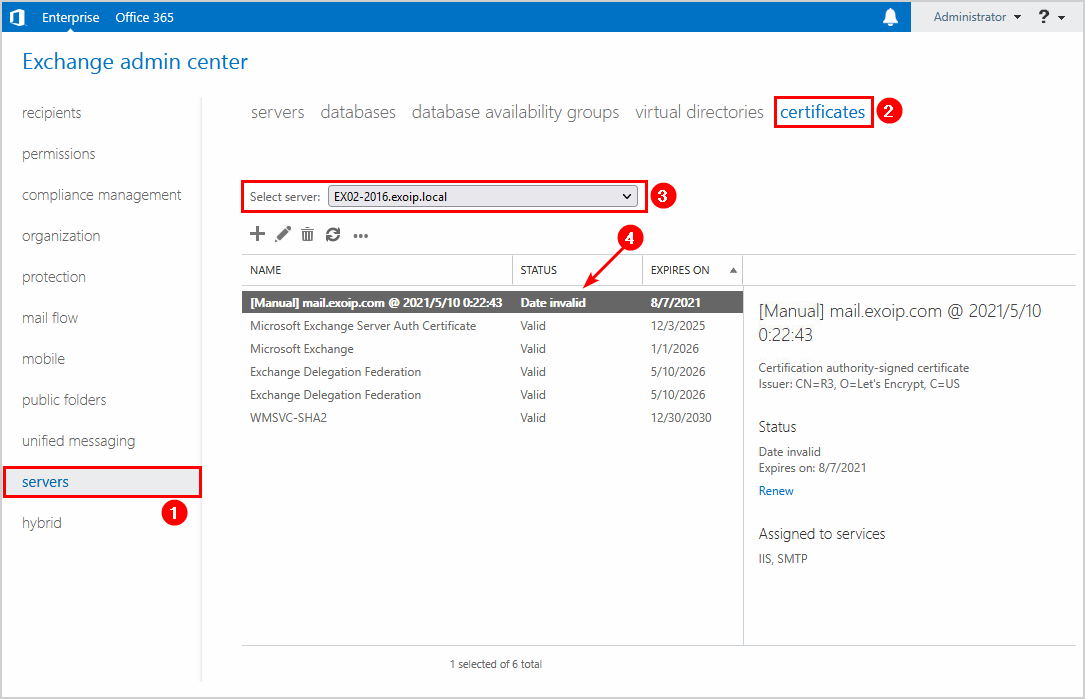
Sign in to the Exchange Server. Navigate to servers > certificates. Select the Exchange Server from the drop-down menu if you have multiple Exchange Servers.
In our example, we have an invalid certificate.
Important: In production environments, you need to renew the certificate before it gets invalid. Otherwise, mail flow will not work.
Install Exchange certificate
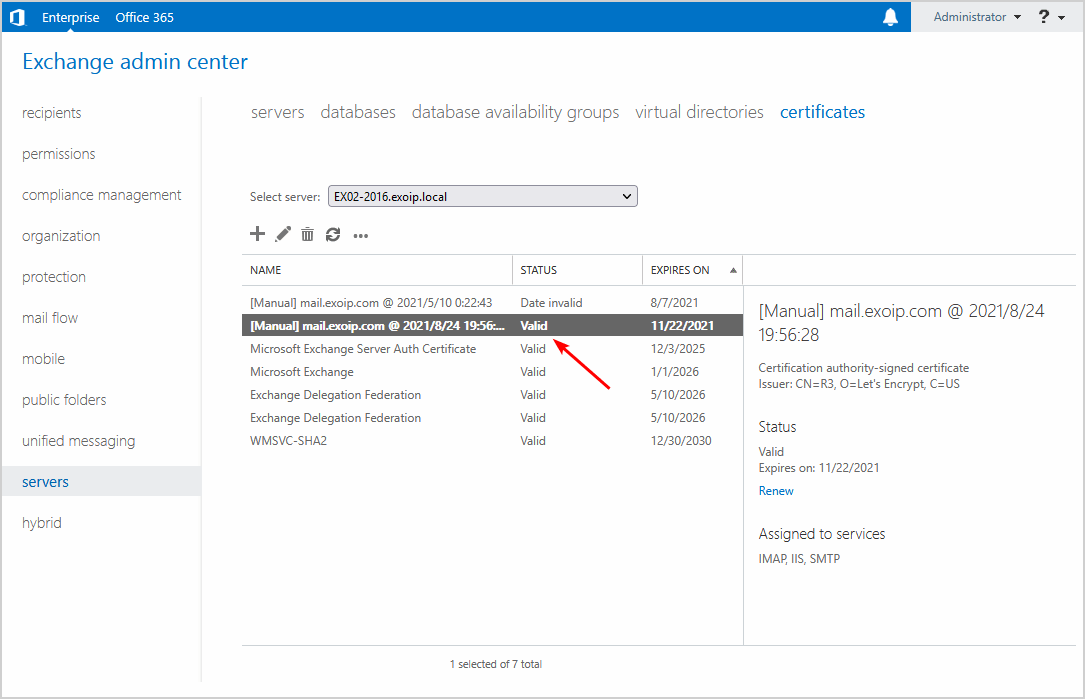
We did install a free Let’s Encrypt certificate on the Exchange Server. Also, we did assign it to the services IMAP, ISS, and SMTP. The certificate shows the status Valid.
Read more: Install Exchange certificate with PowerShell »
These certificates are tagged with following Send Connectors
The new certificate is installed and valid. However, the old certificate is invalid. Let’s remove the old certificate on the Exchange Server to keep everything tidy.
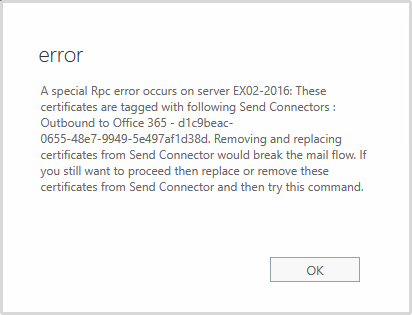
When we want to remove the invalid Exchange certificate, we do get an error.
error
A special Rpc error occurs on server EX02-2016: These certificates are tagged with following Send Connectors : Outbound to Office 365 – d1c9beac-0655-48e7-9949-5e497af1d38d. Removing and replacing certificates from Send Connector would break the mail flow. If you still want to proceed then replace or remove these certificates from Send Connector and then try this command.
Why do we get this error, and what is the solution for removing the certificates that are tagged with the send connector Outbound to Office 365?
Renew certificate in Exchange Hybrid with PowerShell
The solution to this error is that we need to assign the new certificate to the:
- Send connector: Outbound to Office 365
- Receive connector: Default frontend
Important: Do the same steps on the other Exchange Servers.
Follow these steps:
Step 1. Collect information
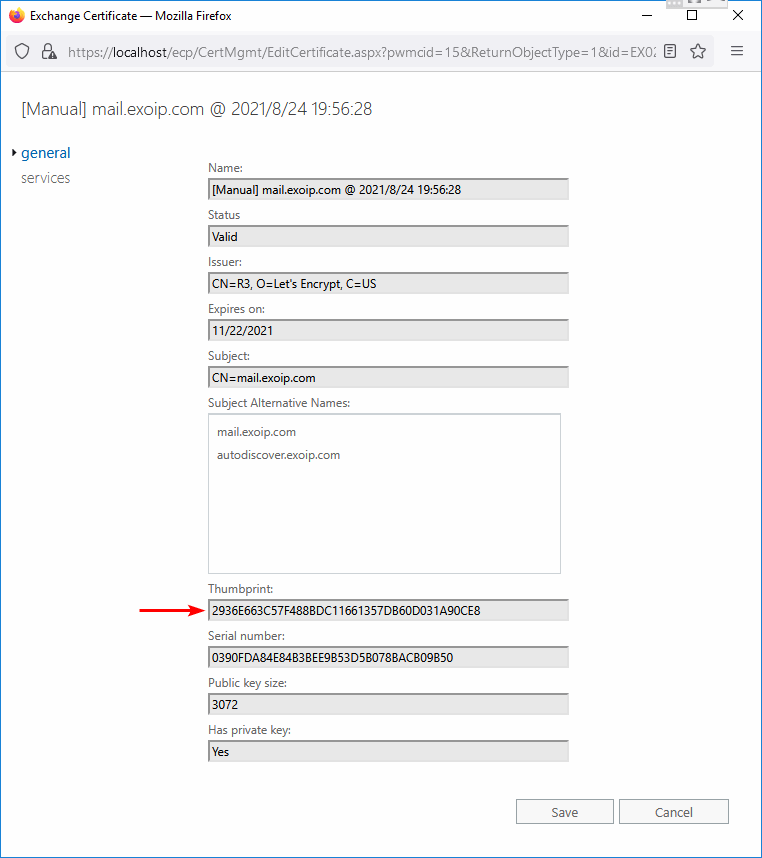
Double-click the new certificate in the Exchange admin center. Copy the Thumbprint.
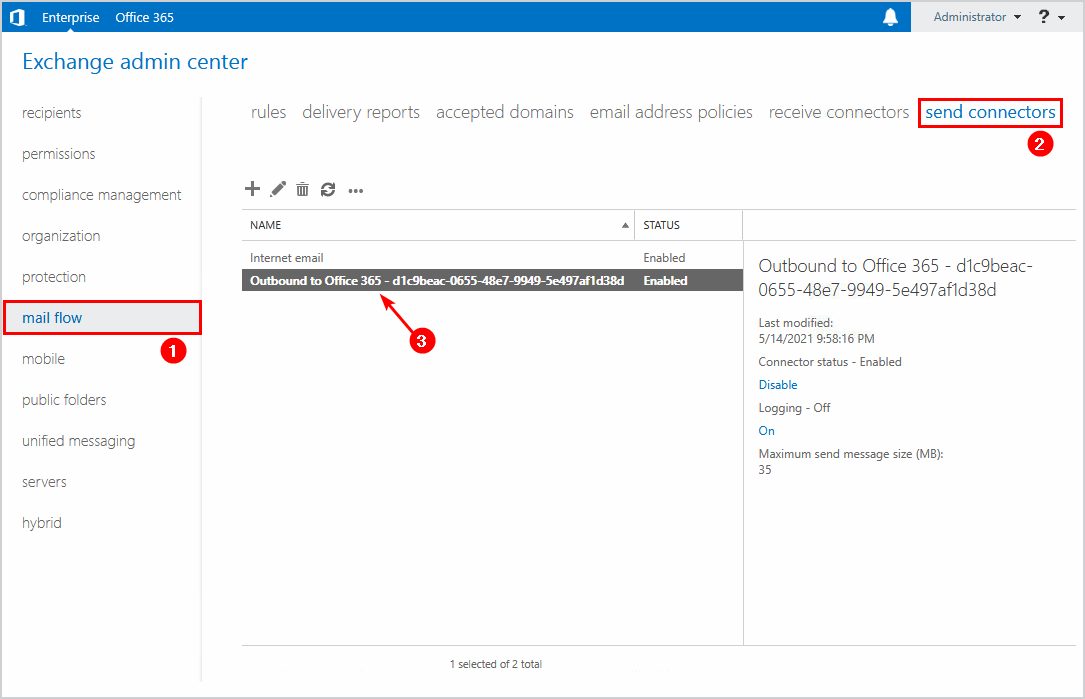
Go to mail flow > send connectors. Copy the Outbound to Office 365 send connector name. In our example, it’s Outbound to Office 365 – d1c9beac-0655-48e7-9949-5e497af1d38d.
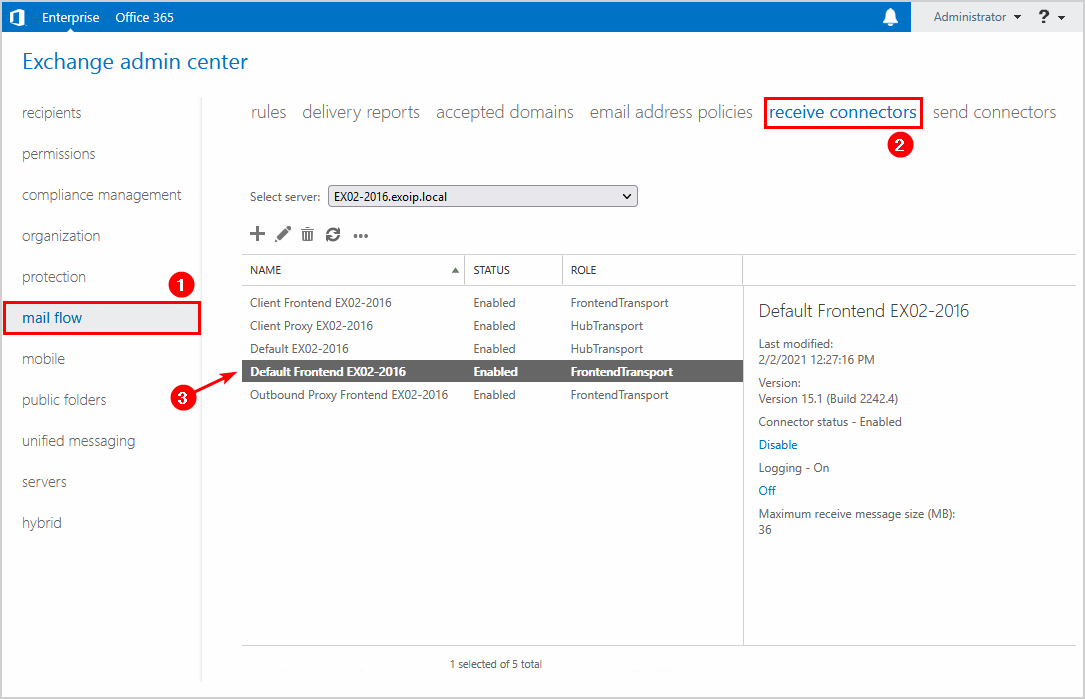
Go to mail flow > receive connectors. Copy the Default Frontend receive connector name. In our example, it’s Default Frontend EX02-2016.
Step 2. Set the new certificate
Run Exchange Management Shell as administrator. Get the Exchange certificate with the thumbprint that you copied in the previous step.
Store the value to the $TLSCert variable.
Store the certificate issuer and certificate subject values to the $TLSCertName variable.
Run the Set-SendConnector cmdlet, including the TlsCertificateName parameter. Fill in the Exchange Server name\send connector name that you copied in the previous step.
Run the Set-ReceiveConnector cmdlet, including the TlsCertificateName parameter. Fill in the Exchange Server name\receive connector name that you copied in the previous step.
You can get a warning as output when you run the Set-SendConnector and Set-ReceiveConnector cmdlets. That’s because the new certificate’s Issuer field and certificate’s Subject field are the same as the old certificate.
In our example, we did add a new Let’s Encrypt certificate. But the old certificate is also from Let’s Encrypt. That’s why we did get the below error.
WARNING: The command completed successfully but no settings have been modified.
When you see the above warning, you don’t have to worry. But you should delete the old certificate. Unfortunately, it will not let you delete it in the Exchange admin center because it still thinks it’s connected to both connectors.
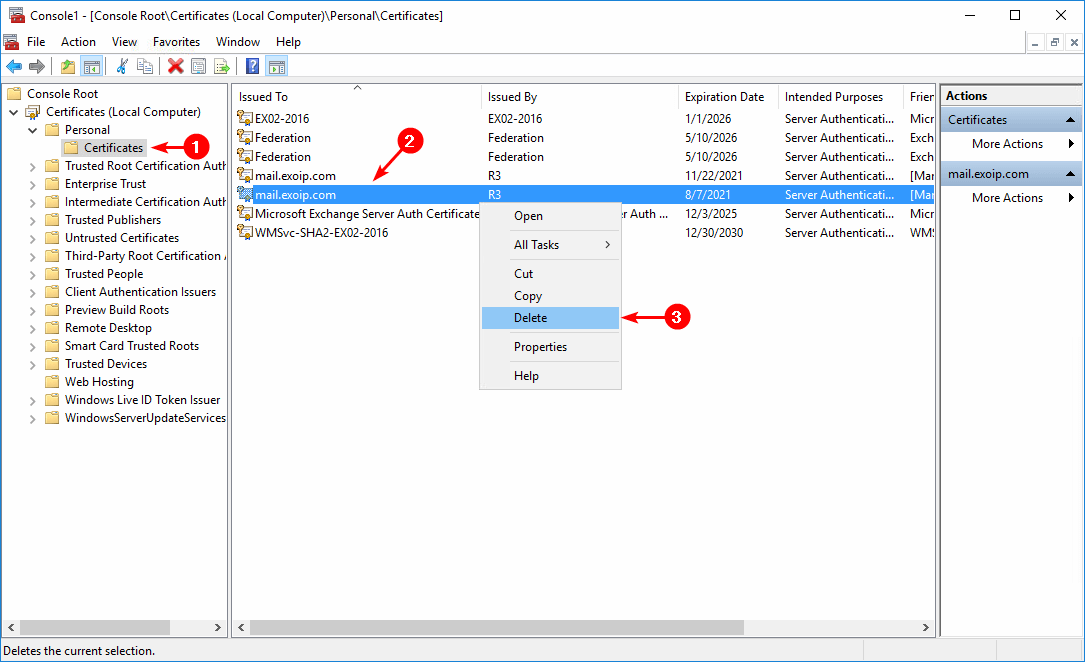
View the certificates in the MMC snap-in, and delete the invalid certificate in the Personal store. An excellent way to identify the certificate is by checking the Expiration Date.
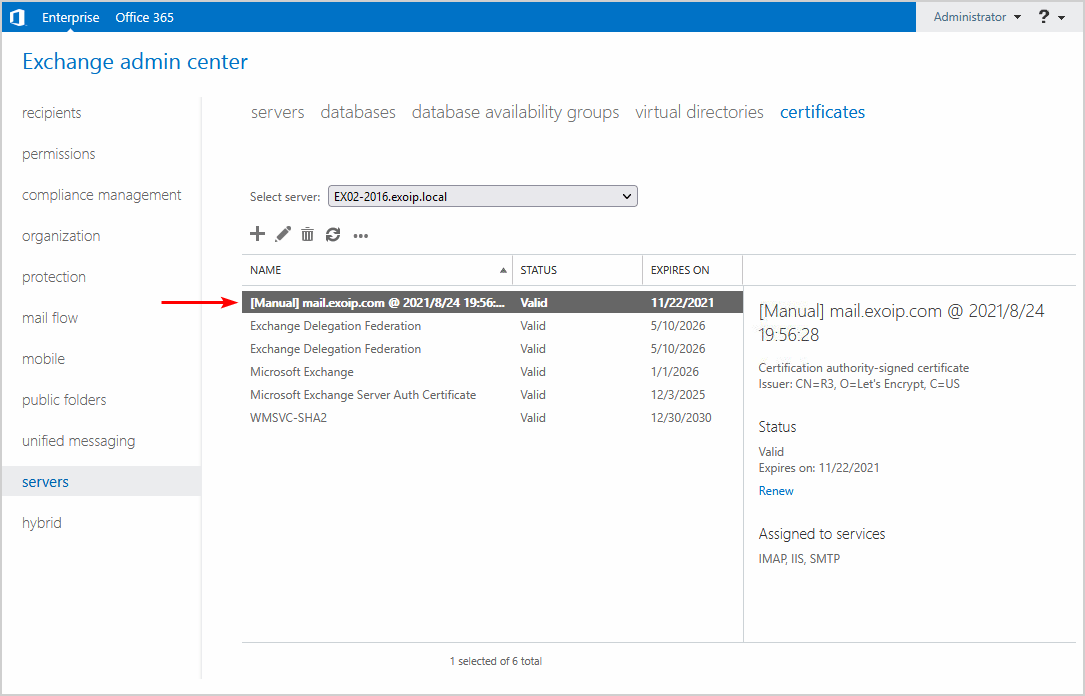
Go back to the Exchange admin center. Refresh the page or click the refresh icon in the toolbar. The old certificate is removed successfully, and the new certificate is still available.
Step 3. Restart IIS
Restart the Internet Information Services (IIS) on the Exchange Server.
Renew certificate in Exchange Hybrid with Office 365 Hybrid Configuration Wizard
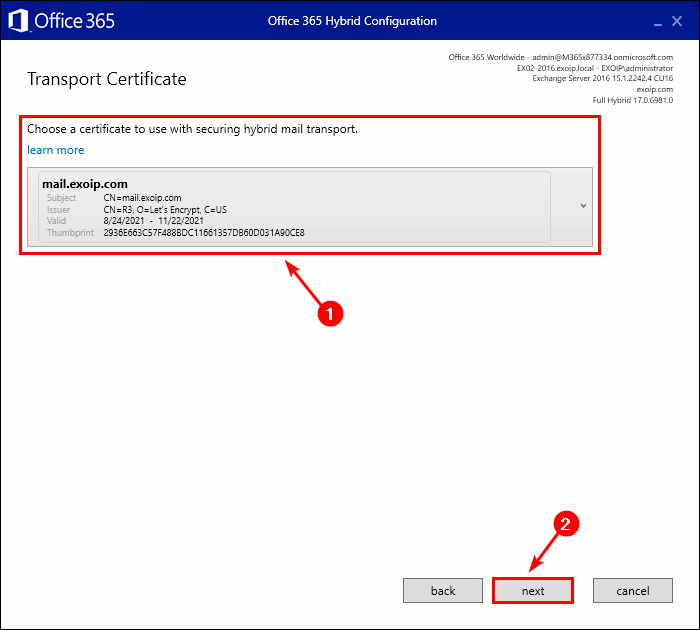
Another way to renew the Exchange Hybrid certificate is to rerun the Hybrid Configuration Wizard. Connect in the first step with your credentials and go through the setup wizard by clicking the Next button.
You will see the Transport Certificate window in the setup wizard. Choose the new certificate. Click next.
Click on update.
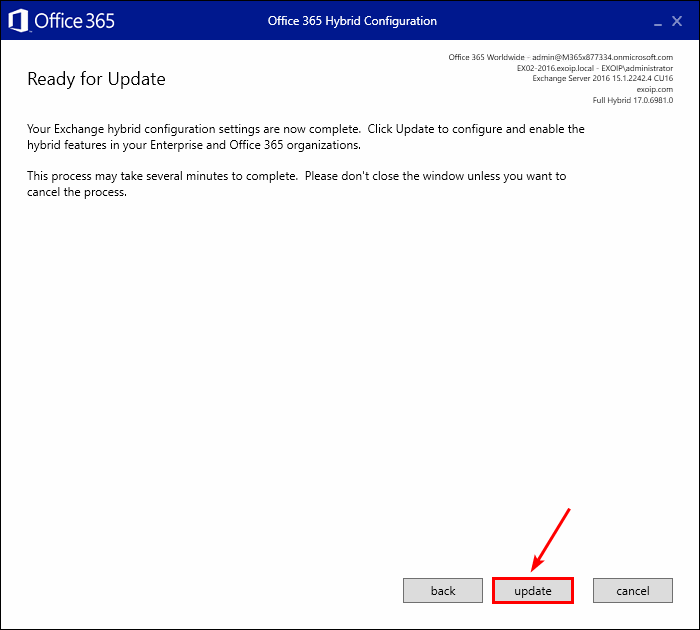
The Office 365 Hybrid Configuration Wizard configured the new certificate for both the send connector and receive connector.
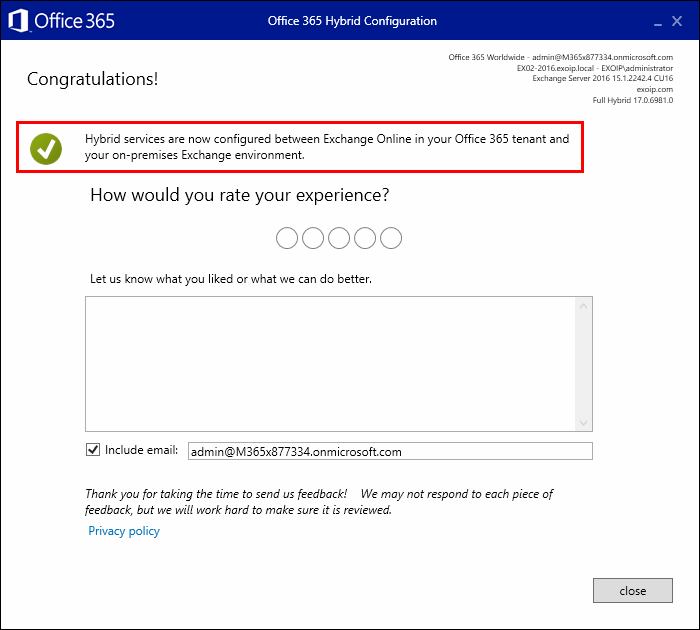
That’s it!


Comentarios
Publicar un comentario
Dime si la información de este blog te sirvio.