PNETLab installation / adding Huawei AR Router Image
Thank to: https://forum.huawei.com/
I would like to share with you how to install PNETLab (Packet Network Emulator Tool Lab) and how to add Huawei AR / USG.
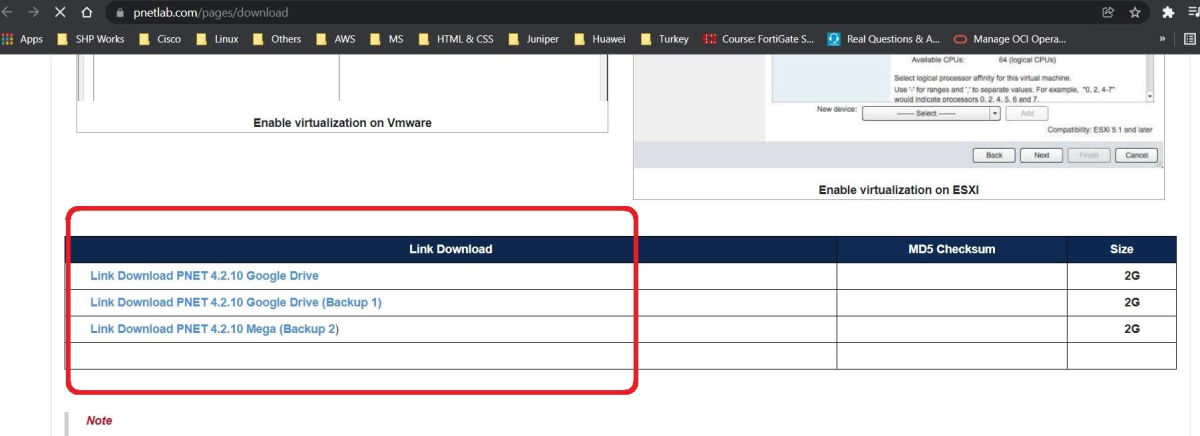
1- Go to https://pnetlab.com/
2- Then Click on Dowload Tab, Select the OVA file from one of the available 3 links, the file size is 2GBytes.
"The latest version available until this post date is 4.2.10"
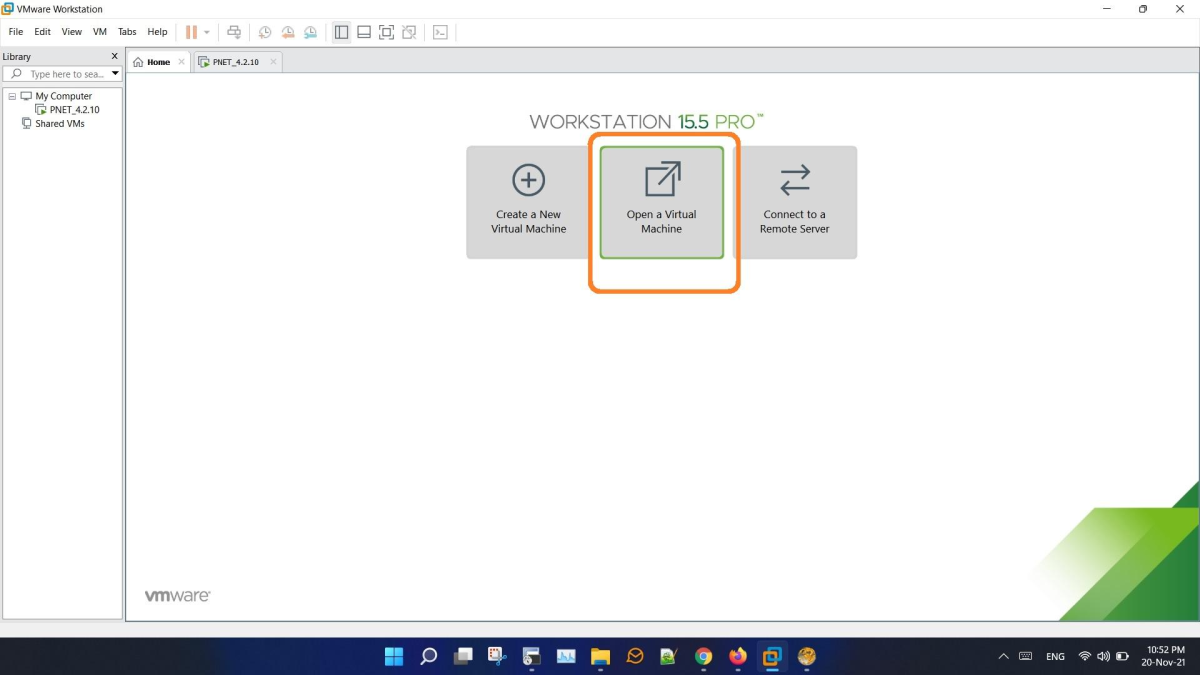
3- Once the download completed, add the ova file to your VMware player, VirtualBox, or VMware Workstation Pro
for my case I am using VMware Workstation Pro:
4- Follow the usual steps of adding any VM like Network adapter setting / Hardware resources RAM/CPU, once completed you should get a screen like this below:
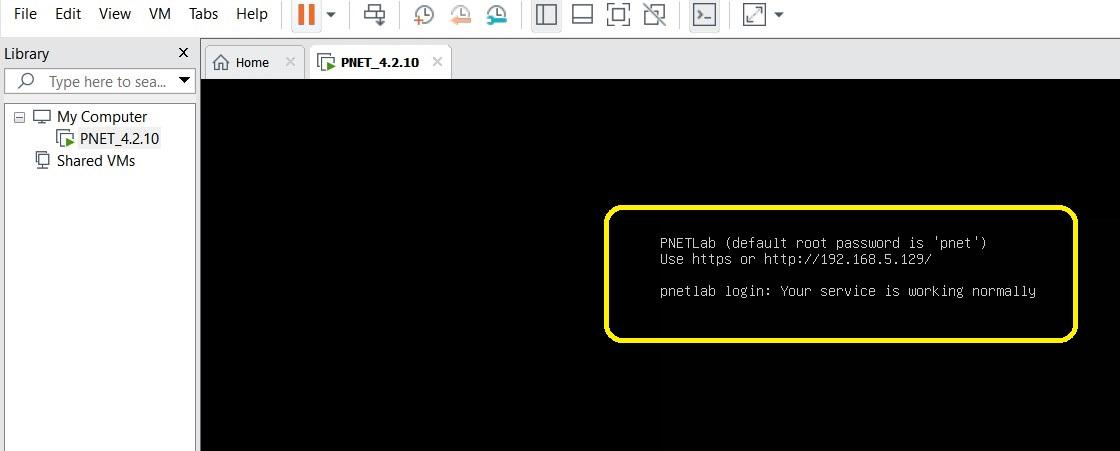
5- Use any SSH software " I recommend SecureCRT" to connect to the server using the IP shown in Step.4
For my case it is 192.168.5.129.
Note that the SSH Credentials for PNETLab server is Username: root /Pass: pnet
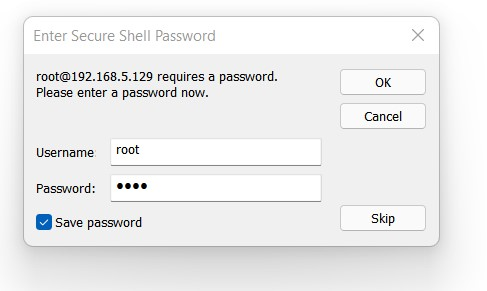
Click OK to access:
6- Now there are couple of ways to import images to PNETLab, but one of the easiest and recomended way is from the search engine inside PNET server, from the SSH screen, use ishare command to search and add the images:
For example, lets search for Huawei keyword to see the images available inside PNETLab online server, using the command: ishare search Huawei
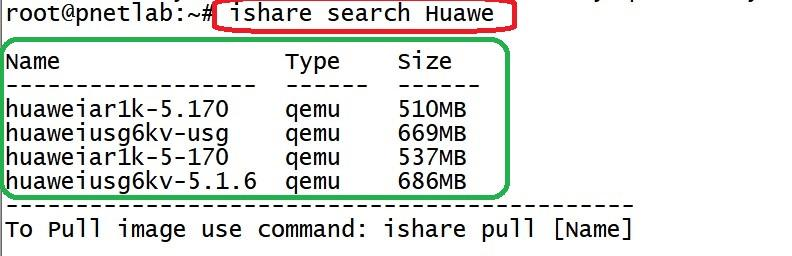
here, as we can see, there are couple of qemu images.
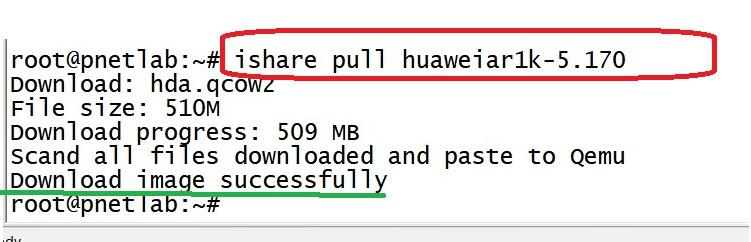
7- To import the desired image to your Lab emulator, use ishare pull command
Lets download the first one huaweiar1k-5.170
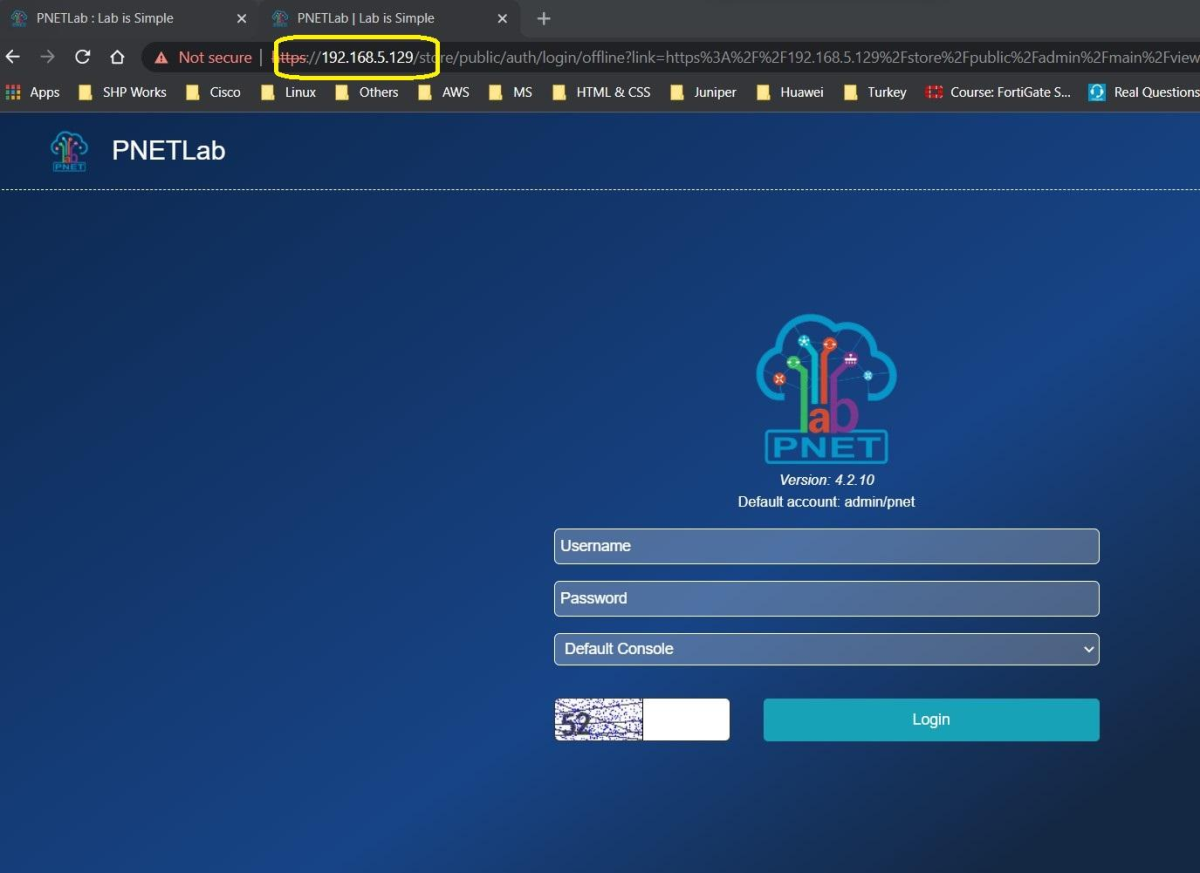
8- After the download completed successfully, go to your browser, and access the LAB console:
the login credentials here are: admin / pnet
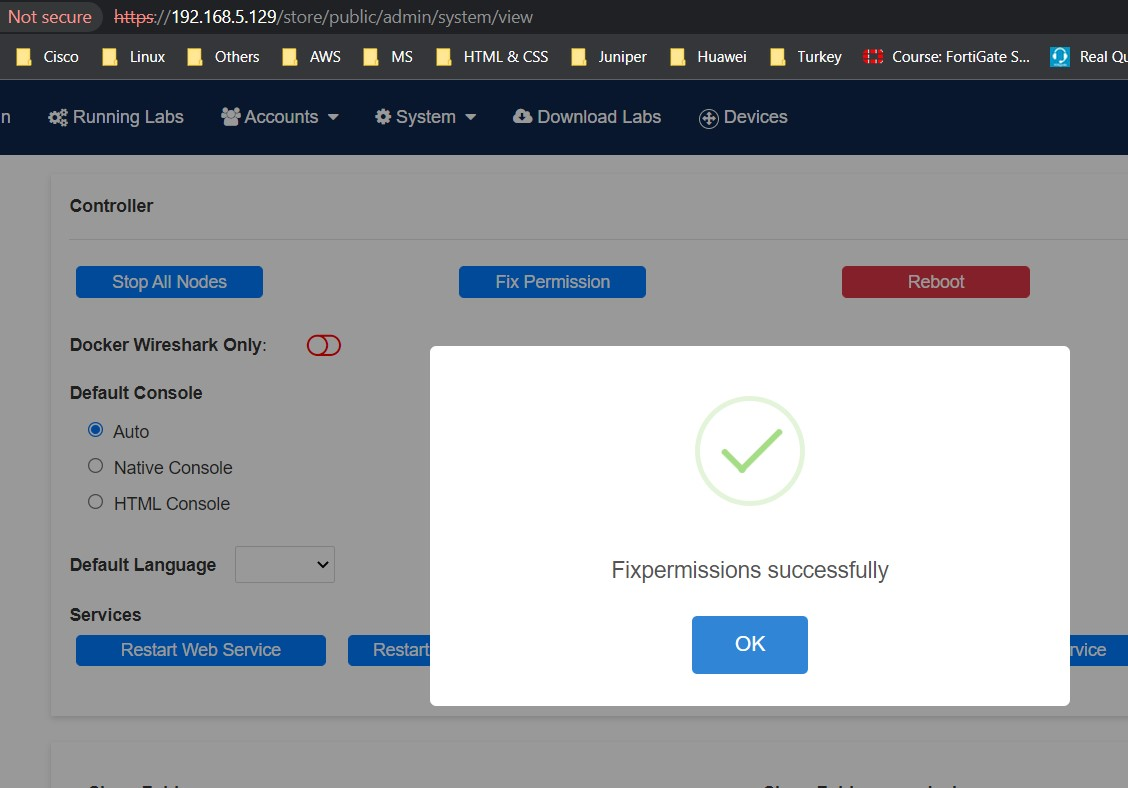
9- After any image imported it is very necessary to fix the permissions for each newly added image, so you can have the read/write access permissions:
Go to Setting ->System setting -> Click on Fix permission
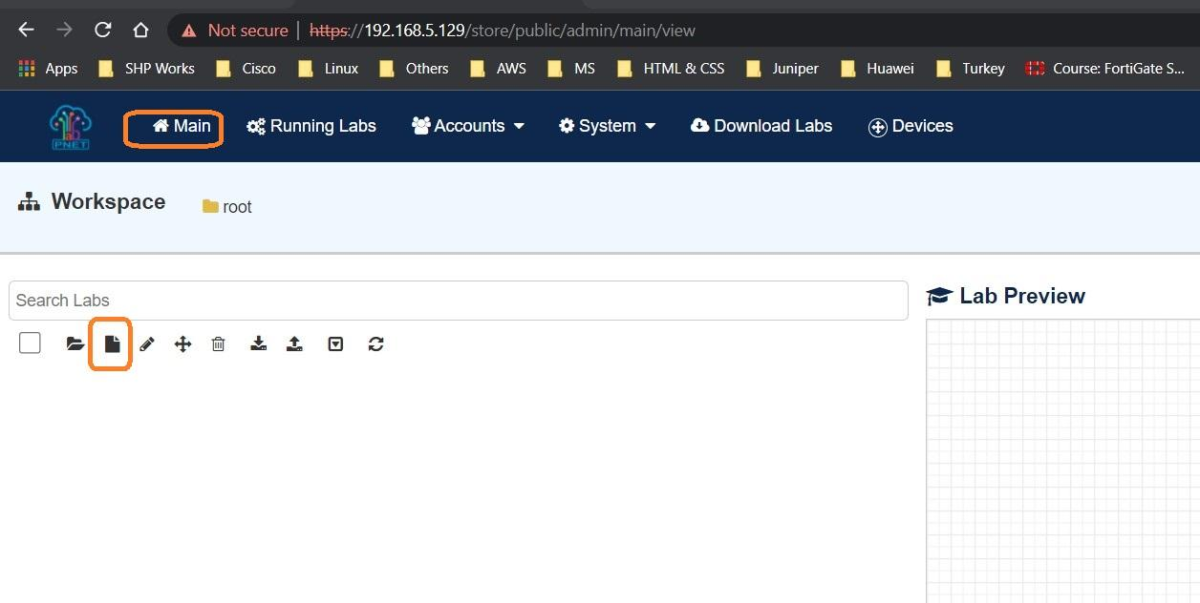
10- Now go back to main tab, and create your LAB:
Click on Main
And select the new Lab icon
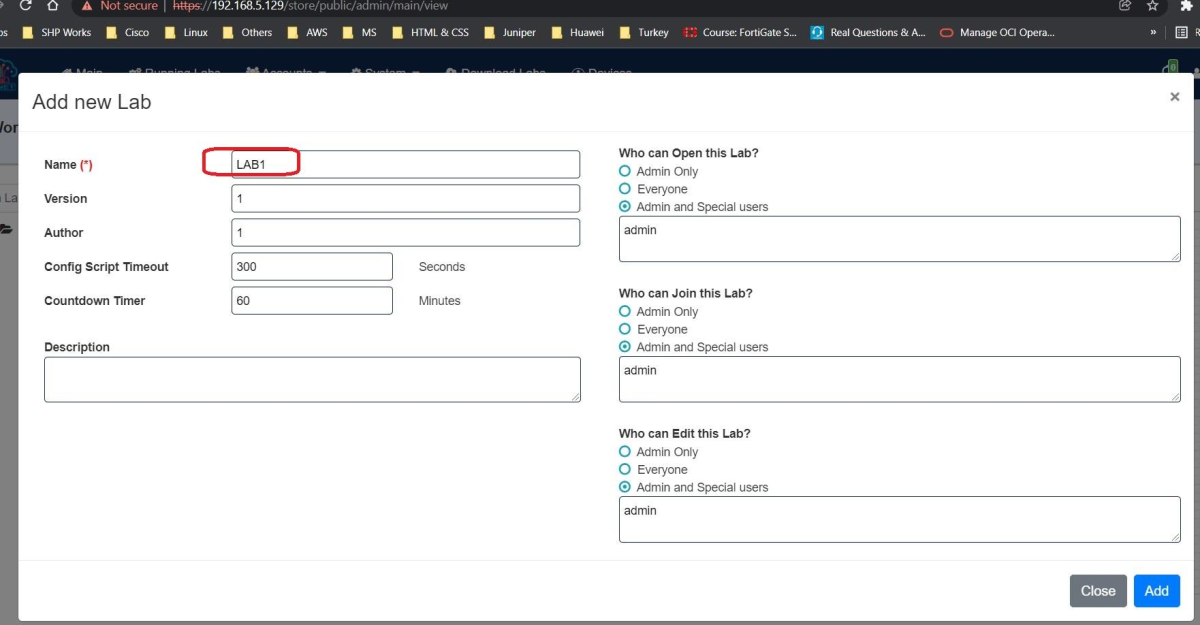
11- Name your Lab, you can leave all the other options as defualt:
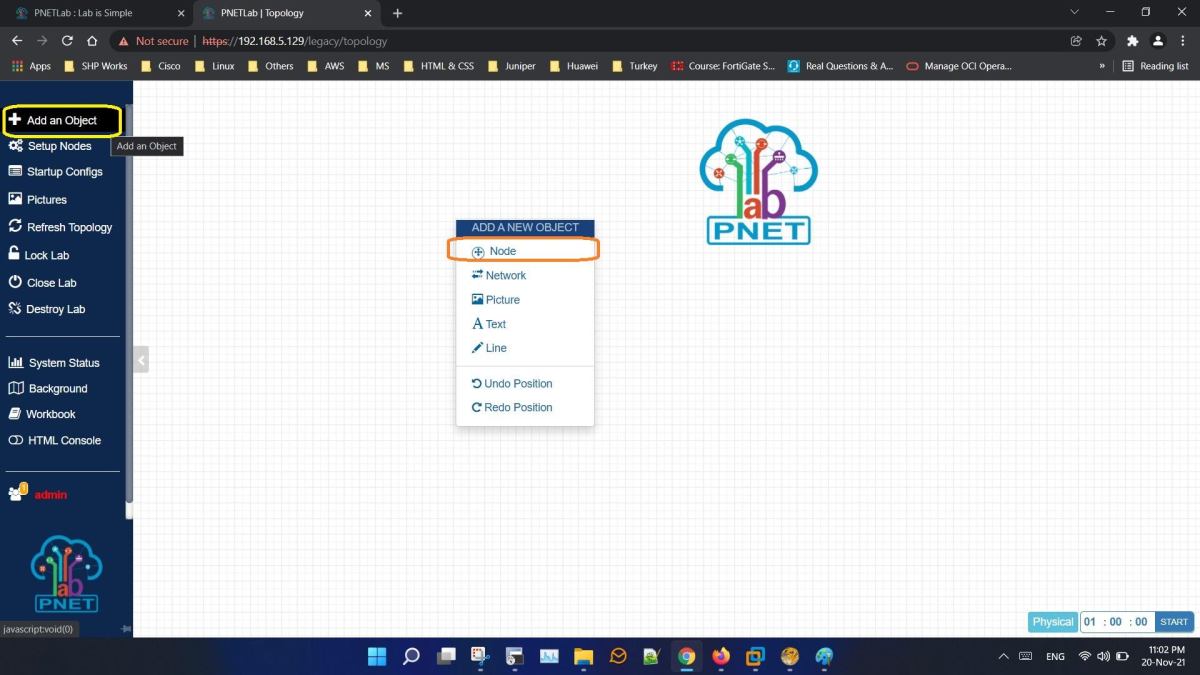
12- Once you click Add, you should be able to see PNETLab emulator interface, and add objects either by right click of your mouse, or by the side bar as shown:
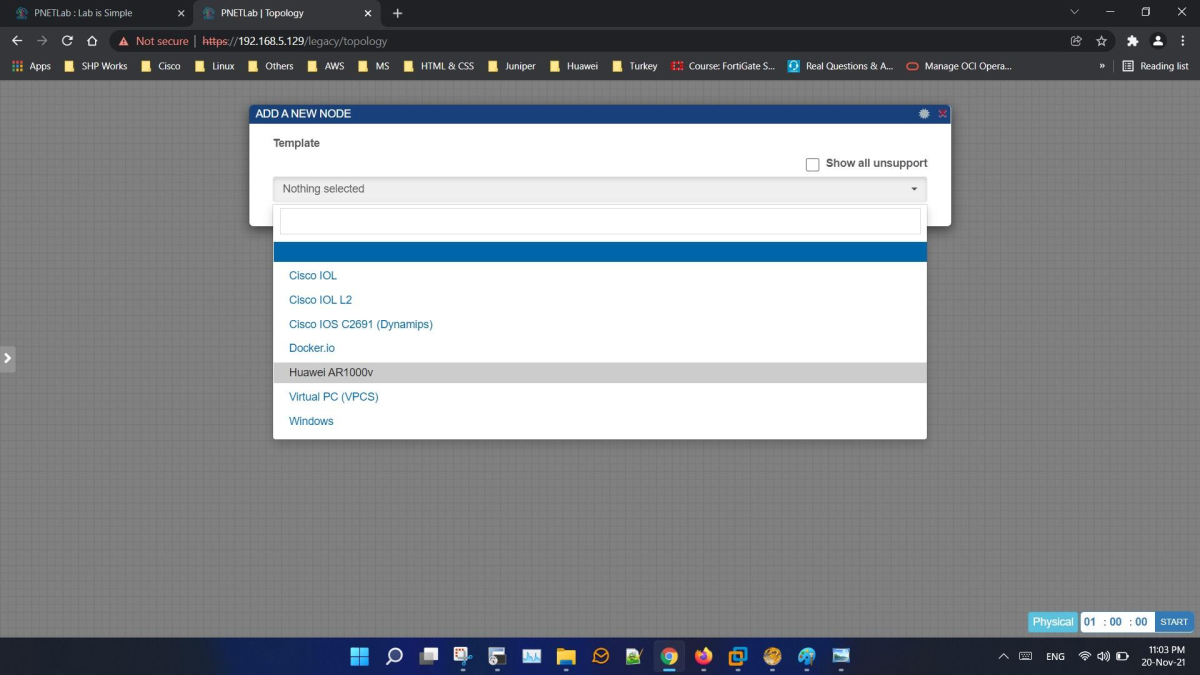
13- Since we imported Huawei AR Router image, we shoule be able to see it in the nodes list:
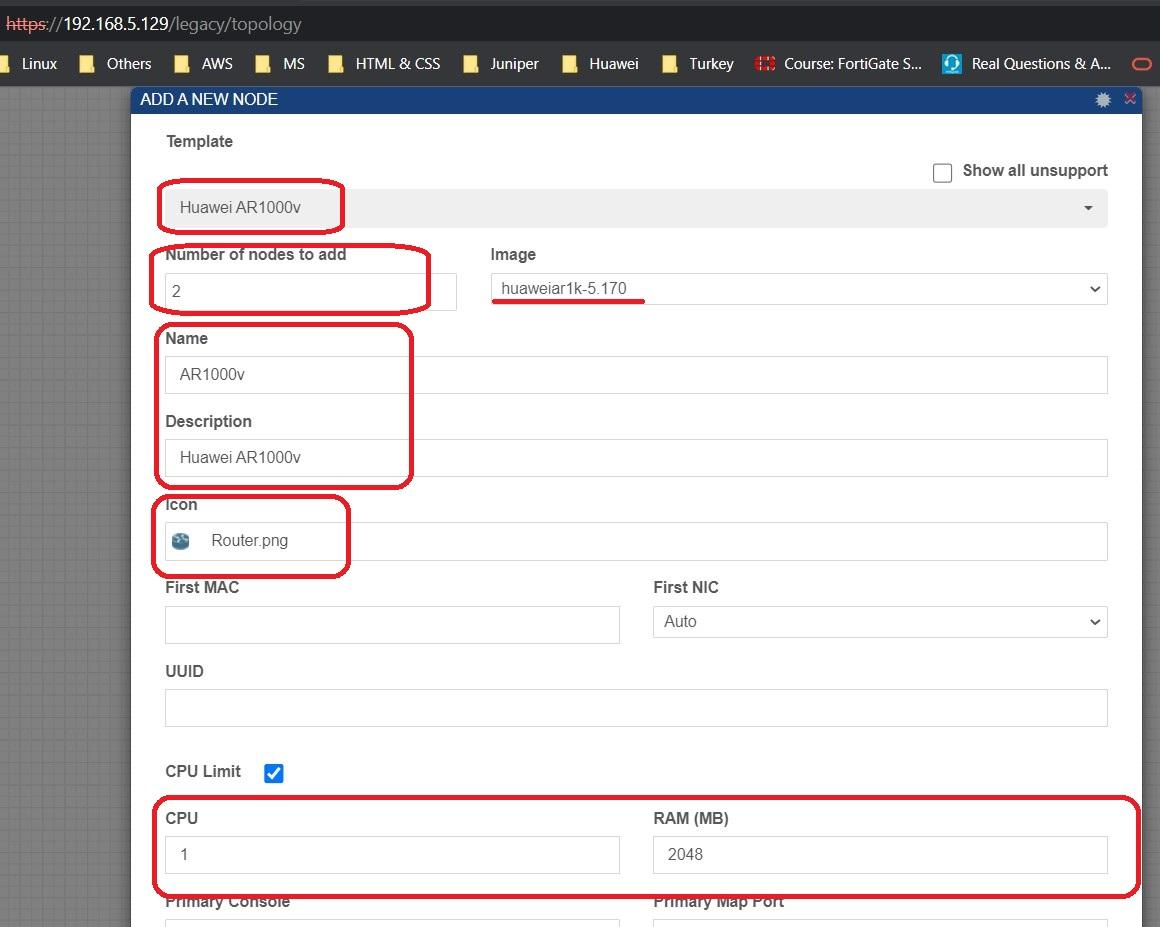
14- Here, you can set how many nodes you want to add to the Lab, name it, and add description, you can also select a suitable icon for the image, increase the resources CPU/RAM:
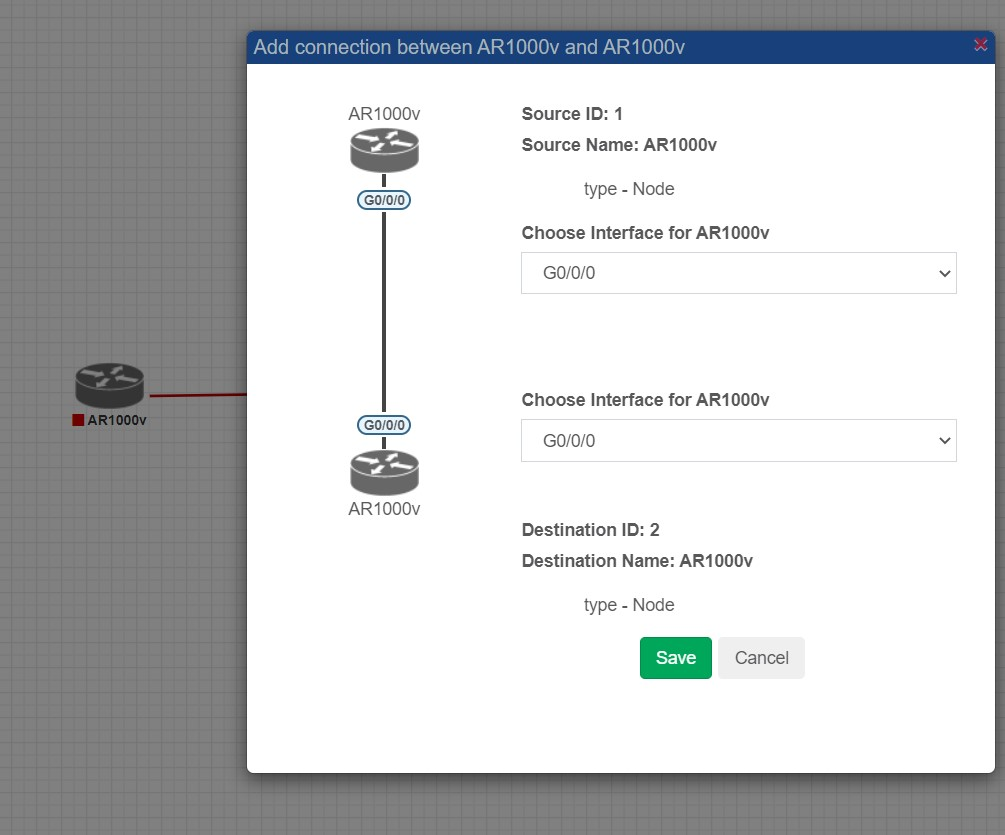
15- Once you done from all options in step 14 click add, connect the devices by draggin the interface icon on each one to, start the images, and enjoy LABing:
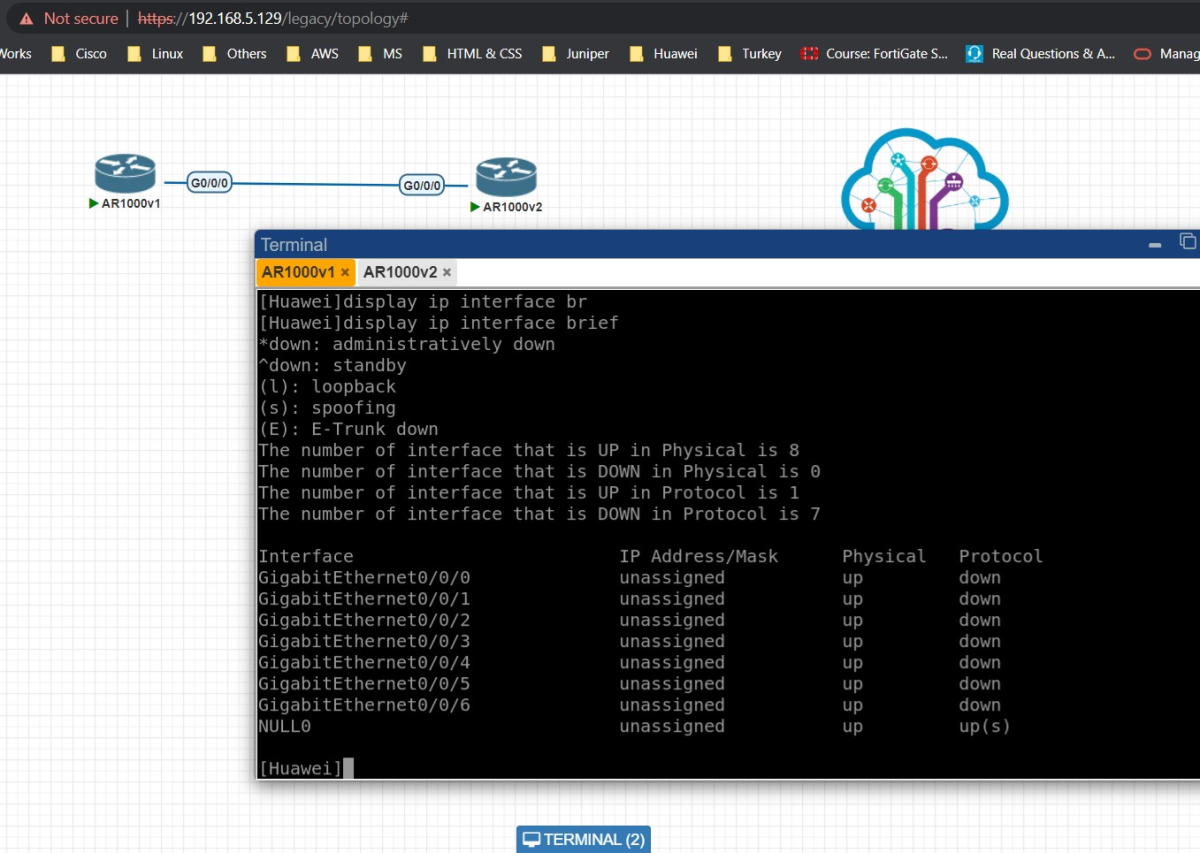
Click on the routers to access:
I hope this has been informative to you all.


Comentarios
Publicar un comentario
Dime si la información de este blog te sirvio.