Cisco FirePOWER Management Center Appliance – Allowing Domain Authentication
Thanks to: https://www.petenetlive.com/
Problem
Once deployed, authentication is handled by the appliances own internal user database, in larger organisations this is a little impractical. So the ability to create an Active Directory Group, and delegate access to Firesight to members of that group is a little more versatile.
Solution
I’m making the assumption that the appliance does not already have external authentication setup at all, so I’ll cover everything from start to finish.
Newer Versions
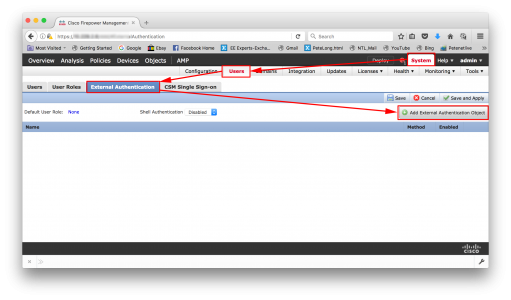
Logon to the Appliance > System >Users > External Authentication > Add External Authentication Object
Older Versions
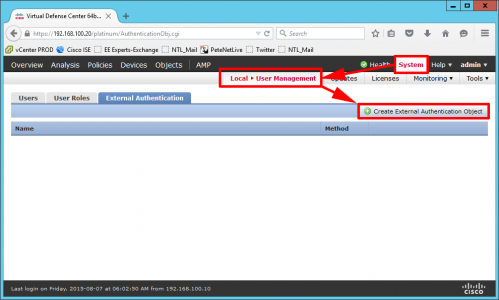
Logon to the Appliance > System > Local User Management > External Authentication > Create External Authentication Object.
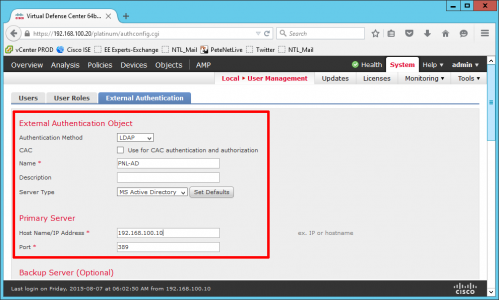
- Authentication Method: LDAP
- Name: Chose a sensible name for the connection.
- Server Type: MS Active Directory
- Host Name/IP Address: the IP of your domain controller
- Port:389 (this is standard LDAP)
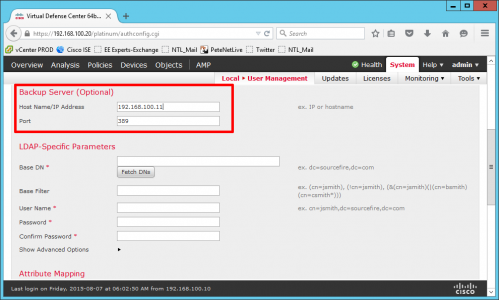
If you have a second Domain Controller enter the details here.
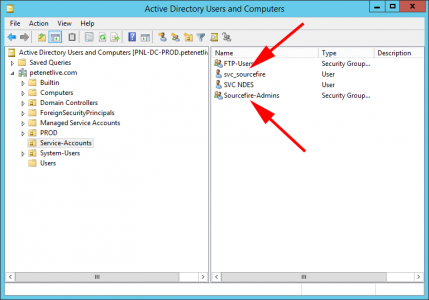
Note: In Active Directory, I’ve created a USER to make the connection to Active Directory with, and I’ve also created a SECURITY GROUP that my administrators will be in.
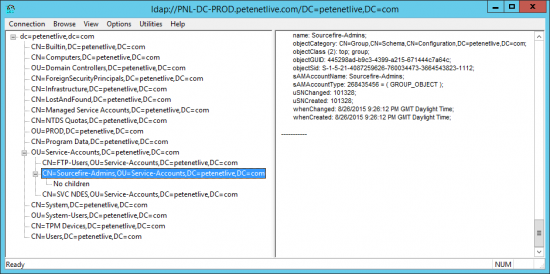
You can use the ldp.exe tool to locate and find the correct LDAP path for the user you created, (and the group because you will need that in a minute as well).
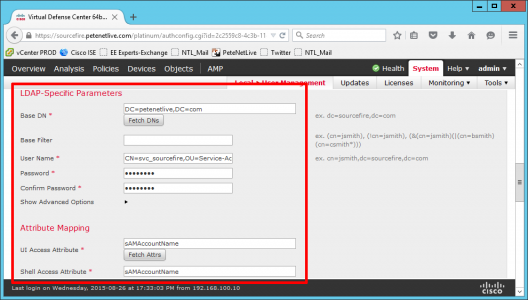
- Base DN: Usually the root of the domain, in standard LDAP format.
- Username: The LDAP path to the user you created.
- Password: For the user above.
- UI Access Attribute: sAMAccountName
- Shell Access Attribute: sAMAccountName
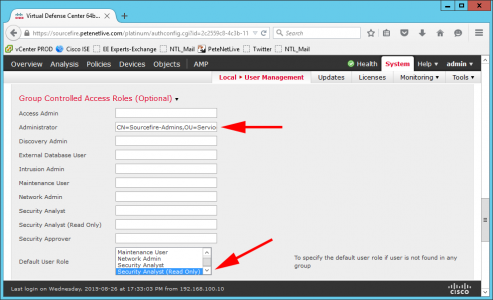
I’m simply having one administrative group, if you have a granular RBAC requirement, there are a number of pre-configured roles you can assign your AD groups to, (or you can create custom ones). So I’m adding the LDAP path of my administrators group to the ‘Administrator’ role.
Also set the default role to ‘Security Analyst (Read Only).
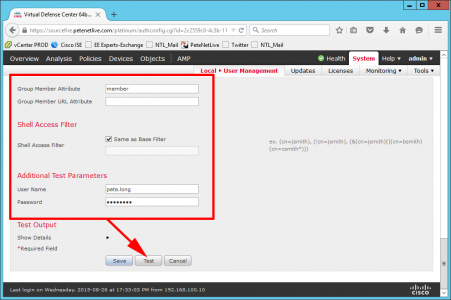
- Group Member Attribute: member.
- Username: A user in the AD Administrative group you created.
- Password: Password for the above account.
Press ‘Test’
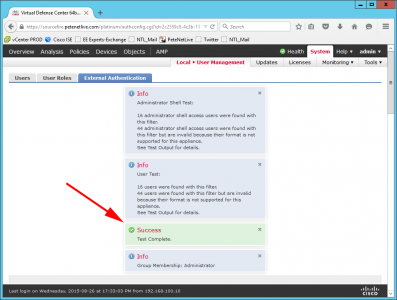
All being well you should see a success, Press Save.
Newer Versions
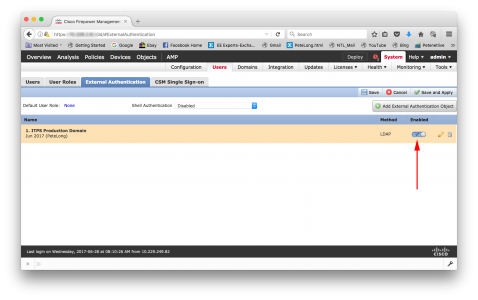
Switch the ‘slider’ to enabled > Save > Save and Apply. (Now skip to All Systems below).
Older Versions
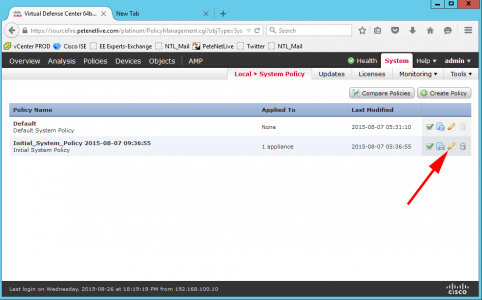
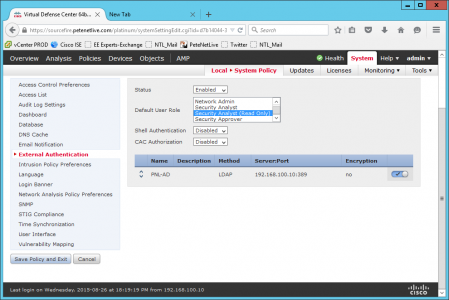
You now need to add this to the policy being applied to this appliance. System > Local System Policy > Select the policy in use >Edit.
External Authentication
- Status: Enabled
- Default User Role: System Analyst (Read Only)
Finally change the slider button and ensure it is ticked. Save policy and exit.
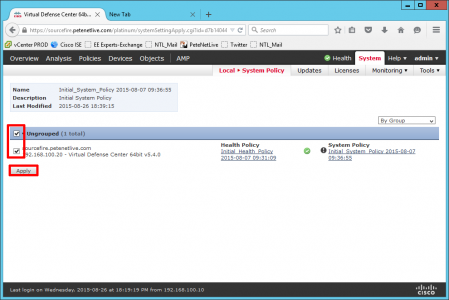
Now apply the policy (green tick).
Tick the appliance > Apply.
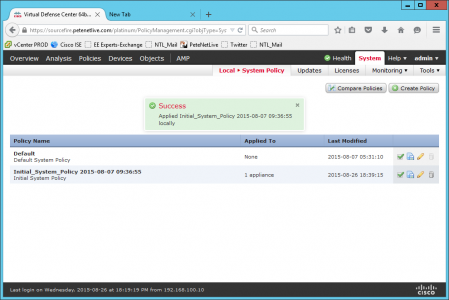
Success.
All Systems
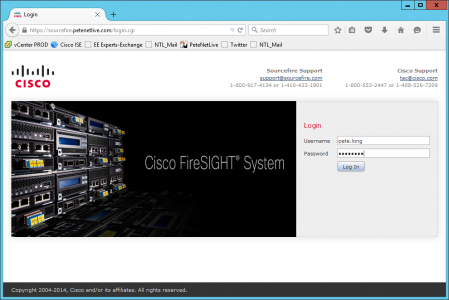
Now you can login with your administrative AD accounts.
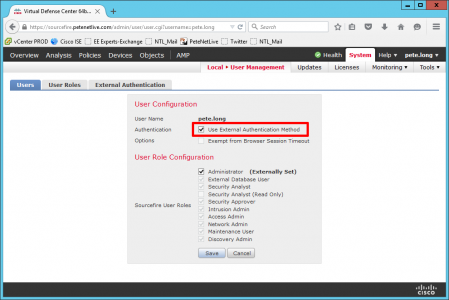
You can also create a local user to match an AD account.
And get the appliance to use AD for authentication of this user.



Comentarios
Publicar un comentario
Dime si la información de este blog te sirvio.