How to Set Up Database Mail for SQL Server Job Failures
Thank to: https://www.sherweb.com/









Hi Everyone!! There is one task I configure quite often as a Database Administrator… setting up Database Mail to send an email if a SQL Server job fails. It isn’t difficult, but if you miss one step, it won’t work. Ugh!!
I’ll list all the steps here so it can be done quickly and easily without losing all but one strand of hair on your head.
Here are the steps:
1. Configure Database Mail.
2. Create a SQL Server job.
3. Adjust the properties within the SQL Server Agent.
4. Create an Operator.
5. Adjust the SQL Server job to send on Failure.
Configuring Database Mail
To complete this step correctly, a properly configured mail server is needed. In most cases it is okay to use localhost, but that requires the installation of Microsoft IIS/SMTP. If your administrator will not allow the install of IIS on a server running SQL Server, get the name of a mail server that can be used.
Step. 1
Open SQL Server Management Studio (SSMS), connect to the Database Engine, expand Management, right-click on Database Mail and then click Configure Database Mail.
Open SQL Server Management Studio (SSMS), connect to the Database Engine, expand Management, right-click on Database Mail and then click Configure Database Mail.

Step. 2
You will then see the splash screen below. Click Next.
You will then see the splash screen below. Click Next.

Step. 3
Leave the default option of “Set up Database Mail by performing the following tasks” selected. Click Next.
Leave the default option of “Set up Database Mail by performing the following tasks” selected. Click Next.

Step. 4
You will get a pop-up below if mail hasn’t been configured yet. Click Yes and then click Next.
You will get a pop-up below if mail hasn’t been configured yet. Click Yes and then click Next.

Step. 5Give the New Profile a name and then click Add.
Step.6
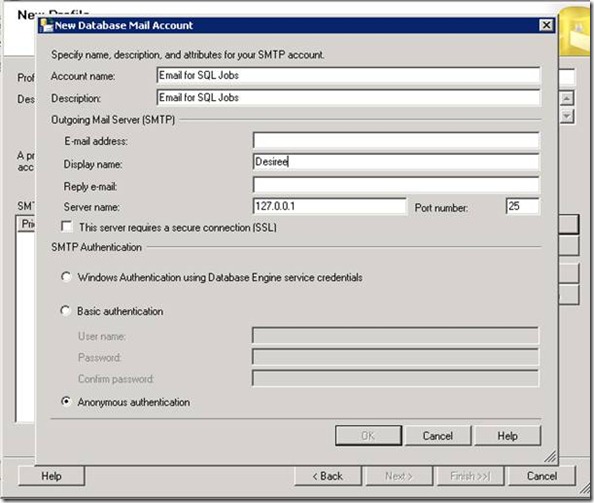
Fill in the correct information as show below.
Fill in the correct information as show below.
· Email address– This should be the sender email address.
· Display name– This should be the name displayed when the email arrives.
· Reply email– This should be set properly too.
· Server name– The mail server address. In this case, I am using localhost.
· SMTP Authentication– I leave this section set to the default, but you can specify it to your needs if it is required.
Note that the OK button will remain grayed out until all required fields are completed. Once all the fields are completed, click OK.

Step. 7
Click Next.
Click Next.

Step. 8
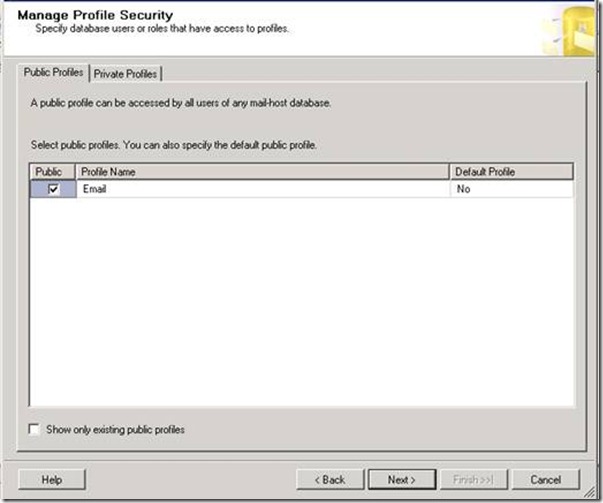
Check the option to make the new profile Public. If the profile isn’t set to Public, permissions will need to be assigned properly. I am not going to discuss this here, but it will be important to note the difference.
Check the option to make the new profile Public. If the profile isn’t set to Public, permissions will need to be assigned properly. I am not going to discuss this here, but it will be important to note the difference.

Step. 9
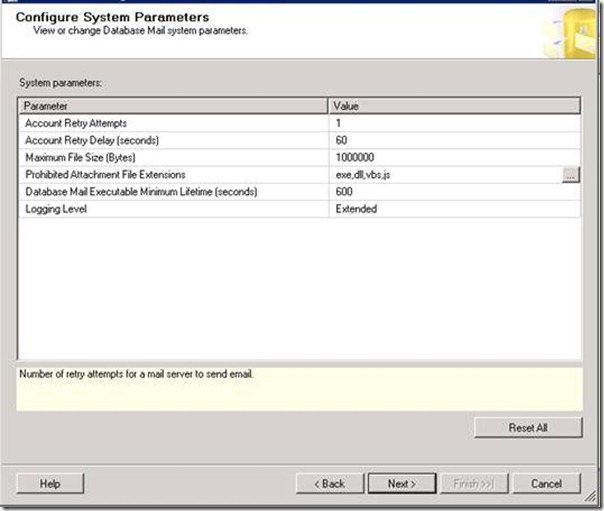
Review the System Parameters. I always use the default settings, but they can be adjusted as needed. You can review the settings in depth here. Click Next.
Review the System Parameters. I always use the default settings, but they can be adjusted as needed. You can review the settings in depth here. Click Next.

Step. 10
Click Finish.
Click Finish.

Step. 11
You should see that each Action was completed and has a Status of Success. Click Close.
You should see that each Action was completed and has a Status of Success. Click Close.

Now let’s test.
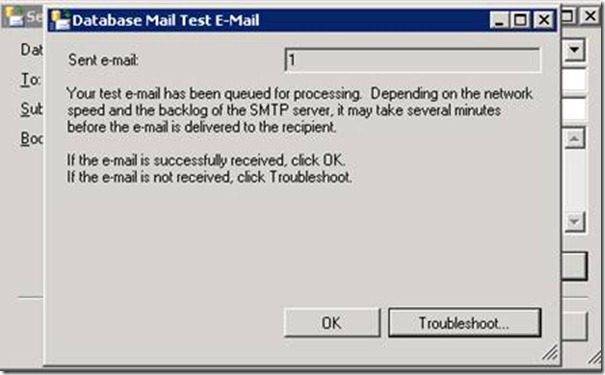
Right-click Database Mail and select Send Test E-Mail… type in an email address to use for testing and click Send Test E-Mail.

You will then see the screen below.

If the email doesn’t arrive, check the mail server to make sure it is properly configured and will accept mail from the SQL Server. You can do this by sending an email via telnet.
Create SQL Server Job
At this point we know the SQL Server can send email. Now we need to setup a SQL Job and then set SQL so it sends emails if the job fails. The easiest way to test this is to setup a Backup job and set it to notify on “Success”. Once it is working properly, change the job to notify on “Failure”. To setup a simple Backup job, see instructions here. Note: The Maintenance Plan Wizard can also be used to setup a backup job very quickly.
Adjust the properties within the SQL Server Agent
Right-click SQL Server Agent and select Properties.

Click on Alert System under Select a page.
· Under Mail session, select the option to Enable mail profile. Ensure the correct Mail profileis selected.
· Under Token replacement, enable Replace tokens for all job responses to alerts.
Click OK. Restart the SQL Server Agent service.

Create an Operator
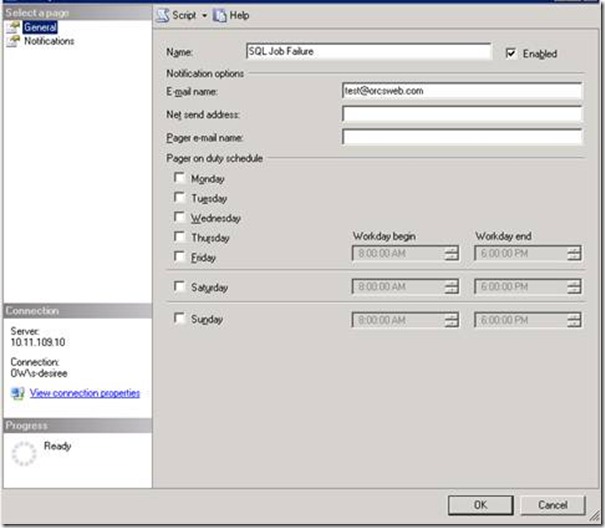
Under the SQL Server Agent, right-click Operators and select New Operator…

Type in the recipient email address in the E-mail name and click OK.

Adjust the SQL Server job to send the email on Success (for testing purposes only).
Expand SQL Server Agent and click on Jobs. Find the job you created above, right click it and select Properties.
Under Select a page, select Notifications. Enable the first option, E-mail. Then select the Operator we just created and change the job to email When the job succeeds (for testing purposes only). Click OK.

That’s it!! Now we test. Run the job we create that will backup databases. You should receive an email similar to the one below once it completes:

If an email isn’t received, restart the SQL Server Agent once more and then test again.


Comentarios
Publicar un comentario
Dime si la información de este blog te sirvio.