Step by Step Installation Of Lync Server 2013 Standard Edition Part 2 – Installing Prerequisites on Front End Server.
Step by Step Installation Of Lync Server 2013 Standard Edition Part 2 – Installing Prerequisites on Front End Server.
In Part 1 We saw the installation of Windows Server 2012, promoting the server to Domain Controller and installation and configuration of Certificate Authority. In this post we will install
prerequisites on the Front End Server that must be installed before you deploy Lync Sever 2013 successfully. We will be performing the below steps in the server named FE.PRAJWAL.LOCAL which is the Front End Server and the user account will be LyncAdmin.
prerequisites on the Front End Server that must be installed before you deploy Lync Sever 2013 successfully. We will be performing the below steps in the server named FE.PRAJWAL.LOCAL which is the Front End Server and the user account will be LyncAdmin.
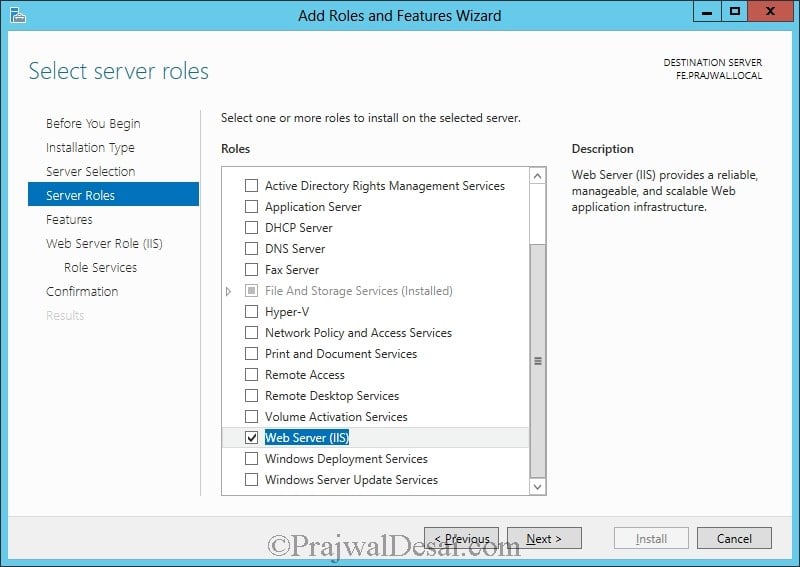
Login to the Front End Server with the user account LyncAdmin. Click on Server Manager, Click Add Roles and Features. Check the role Web Server(IIS). Click Next.
Install the below listed Features.
.Net Framework 3.5 Features – >.Net Framework 3.5, HTTP Activation, Non-HTTP Activation.
.Net Framework 4.5 Features -> .Net Framework 4.5, ASP.NET 4.5
WCF Features ->HTTP Activation, Message Queuing Activation, Named Pipe Activation, TCP Activation, TCP Port Sharing.
User Interfaces and Infrastructure -> Desktop Experience.
Windows Identity Foundation 3.5.

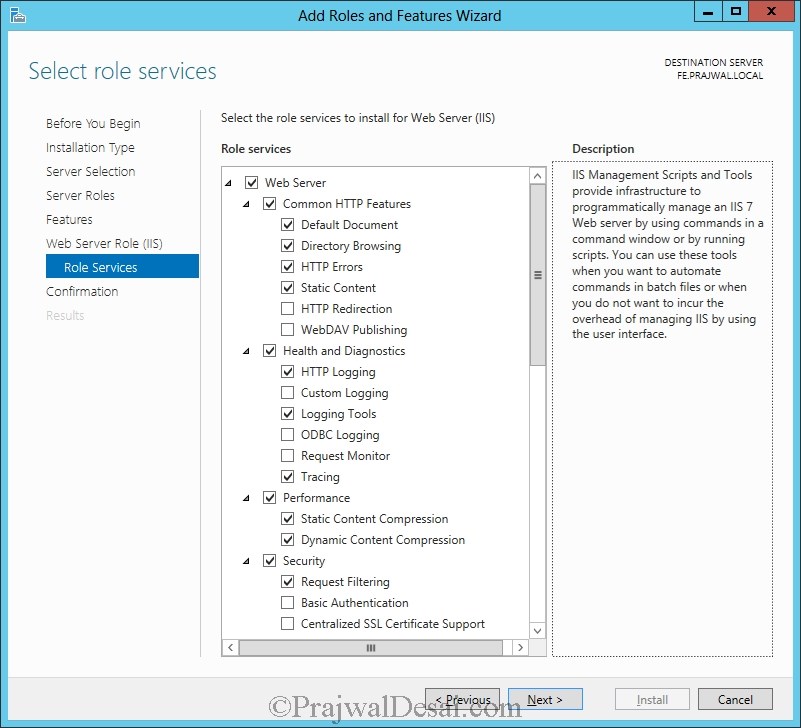
Click Next and Role Services Page install the following.
Common HTTP Features Installed -> Static Content, Default document, HTTP Errors, Directory Browsing.
Health and Diagnostics -> HTTP logging, Logging Tools, Tracing.
Performance -> Static Content Compression, Dynamics Content Compression.
Security -> Request Filtering, Client Cert Mapping Authentication, Windows Authentication
Management Tools -> IIS Management Console, IIS management Scripts and Tools.
Application Development -> ASP.NET 3.5, ASP.NET 4.5, .NET extensibility 3.5, .NET extensibility 4.5, ISAPI extensions.
Before you proceed to install we need to specify the alternate source path. At the bottom of the windows, click Specify anAlternate Source Path.
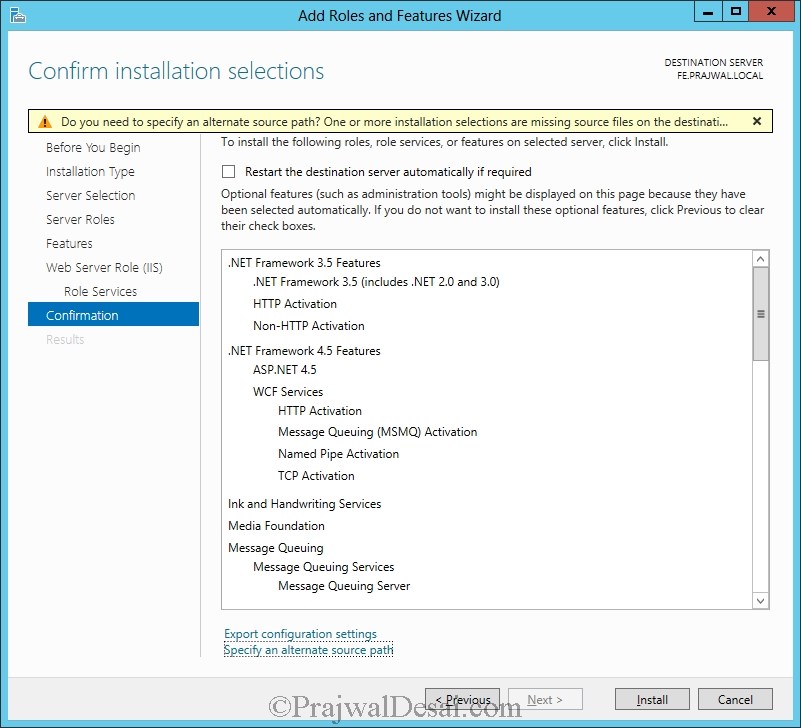
Provide the Alternate Source Path as D:\Sources\sxs. If you have copied the source files to a folder or shared folder, provide the relevant path. Click OK.
Note : If you don’t specify the alternate path, the installation of the roles and features selected will fail.
The Server will reboot and you will see all the roles and features that were selected are installed.

Installing RSAT and Silverlight.
To Install the Remote Server Administration Tools, Click on Server Manager, Add Roles and Features, check Remote Server Administration Tools Feature.

The RSAT Installation is complete. Click Close.

Installing Silverlight.
Download the silverlight from here : http://www.microsoft.com/silverlight. Install the Silverlight.

Press F5 and click on close.


Comentarios
Publicar un comentario
Dime si la información de este blog te sirvio.