Configuring Share-Nothing Live Migration in Windows Server 2012 R2 Hyper-V
Thanks to: http://www.msserverpro.com

Image Copy From Microsoft.


Moving a running virtual machine from one host to another with no downtime to running applications is called Live Migration that works with Standalone servers or Failover Cluster server. Live migration without shared storage (also known as “Shared Nothing” live migration) is new in Windows Server 2012, and it’s continue in Windows Server 2012 R2 with some add Advanced features in Performance options like TCP/IP, Compression and SMB. Compression features is enabled by default and over 2x improvement in live migration time with the existing hardware. It enables you to migrate your virtual machines and their associated storage between servers running Hyper-V within the same domain. This kind of live migration uses only an Ethernet connection. This live migration solution does not provide high availability – there is no shared storage. If you are managing a Hyper-V host remotely and you want to move a virtual machine, you must first allow Kerberos protocol delegation for the computer account of the Hyper-V host.
Here, I will show you how to configure Live Migration without shared storage.

Image Copy From Microsoft.
Prerequisites:
- The source and destination Hyper-V Hosts belong to the same Active Directory Domain or to domains that trust each other.
- On the Hyper-V Host, log in as a member of the Domain Administrators group to perform live migration.
- Keep Hosts Consistent in all Hyper-V Hosts (optional) as shown in figure.

Task 1: Configure Constrained Delegation
1. On KTM-HOST1, log in as Domain Administrator (Administrator). Open Active Directory Users and Computers, in the navigation pane, expand msserverpro.com and click then Hyper-V Server OU. Right-Click on Hyper-V Host, KTM-HOST1 and select Properties.

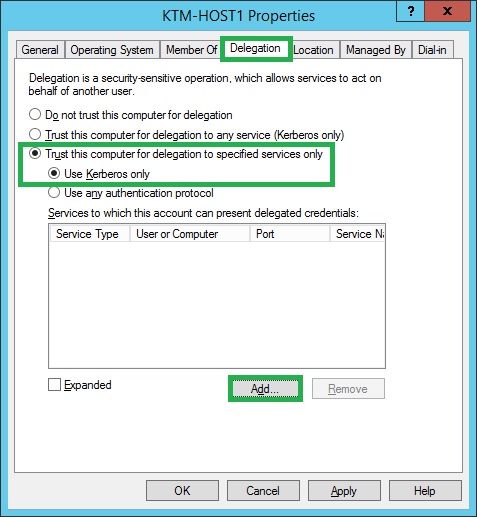
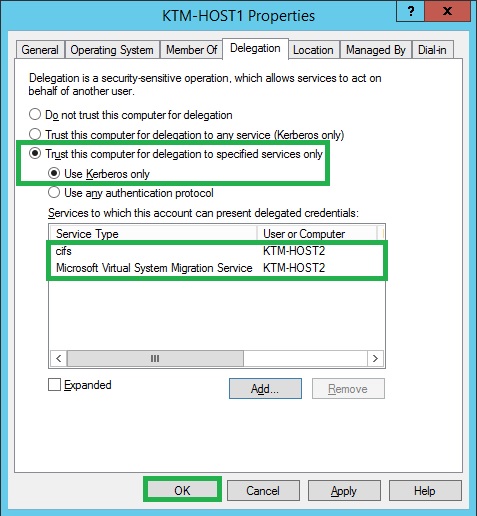
2. In the KTM-HOST1 Properties, Click the Delegation tab. On the Delegation tab, click the Trust this computer for delegation to specify services only option, then click Use Kerberos only and Click Add.
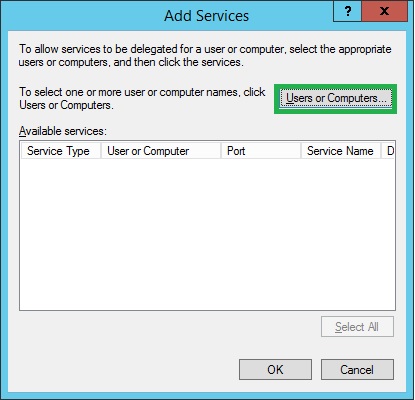
3. In Add Services, click Users or Computers.
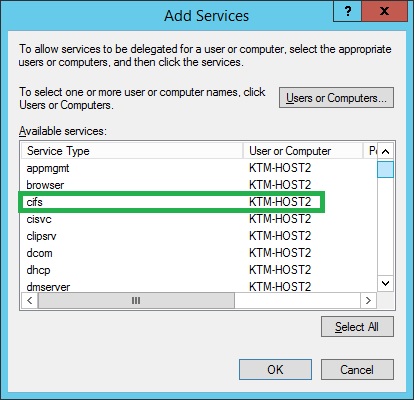
4. In Select Users or Computers, in the Enter the object names to select field, type KTM-HOST2, and then click OK.

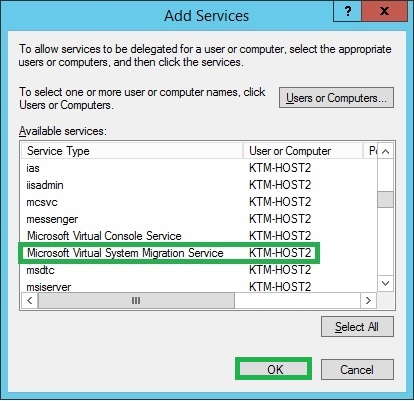
5. In Add Services, select both cifs and Microsoft Virtual System Migration Services service types, and then click OK.
6. In the KTM-HOST1 Properties dialog box, on the Delegation tab, confirm that both services are listed and then click OK.
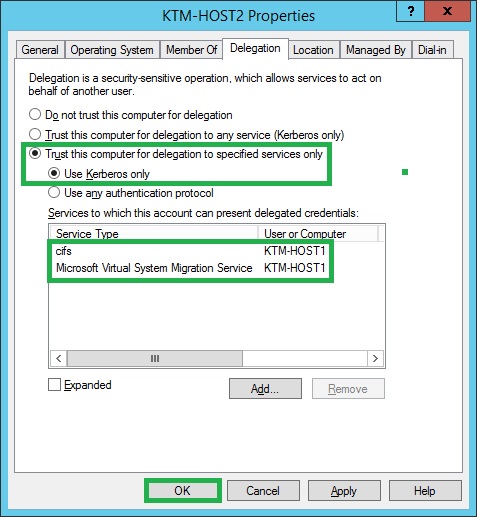
7. Do the same process on KTM-HOST2. Here, In Select Users and Computers, in the Enter the object names to select field, type KTM-HOST2, and then click OK. In the KTM-HOST2 Properties dialog box, on the Delegation tab, confirm that both services are listed and then click OK.
Task 2: Configure Live Migrations Hyper-V Host settings:
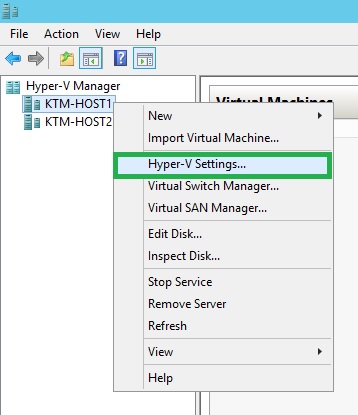
1. In Hyper-V Manager, right-click KTM-HOST1, Click Hyper-V Settings.
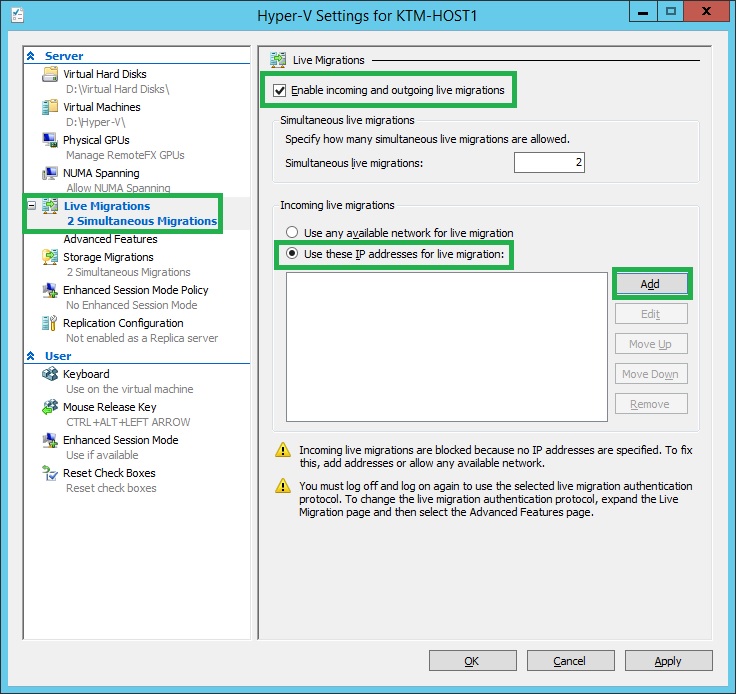
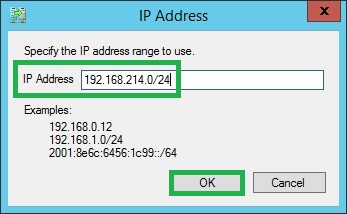
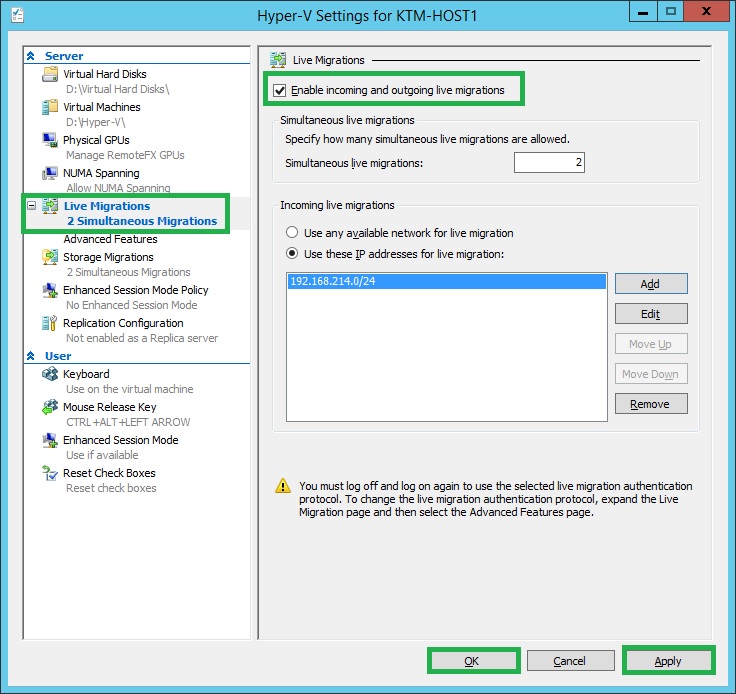
2. In Hyper-V Settings, in the left pane, click Live Migrations. In the right pane, in the Live Migrationssection, click Enable incoming and outgoing live migrations. Select the option for Incoming live migration toUse these IP addresses for live migration. Click Add. In the IP Address dialog box, specify the IP address range to use and click OK. Click Apply and Click OK.
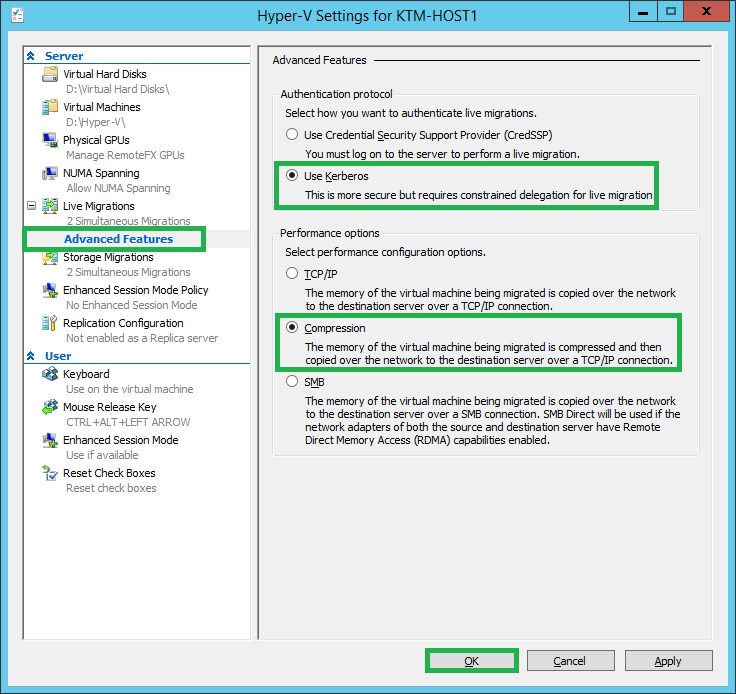
3. In the Hyper-V Settings, expand Live Migrations, click Advanced Features, and select Use Kerberos to be used as Authentication Protocol and select Compression to be used as Performance Options. Then ClickOK.
Task 3: Performing Live Migration Move a Virtual Machine:
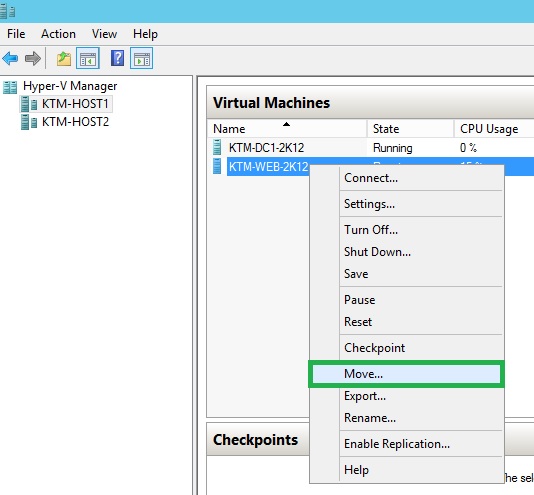
1. On KTM-HOST1, In Hyper-V Manager, right-click KTM-WEB-2K12, and then click Move.
2. In the Move “KTM-WEB-2K12” Wizard, On Before You Begin page, click Next.

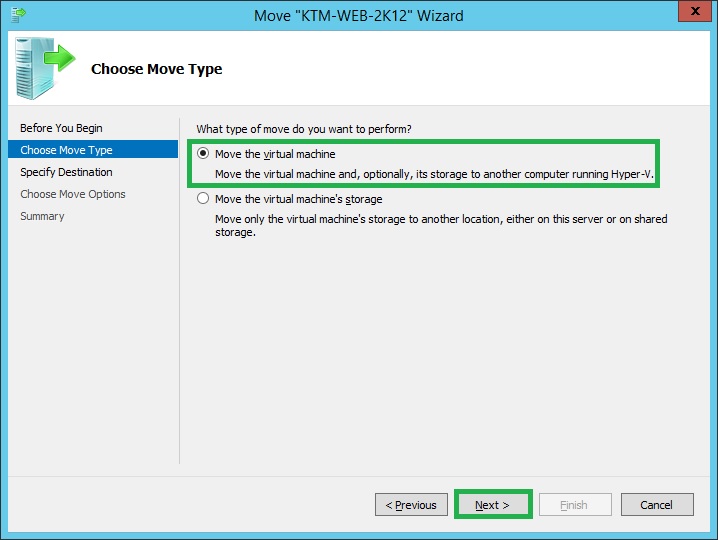
3. On the Choose Move Type page, select Move the virtual machine and then click Next.
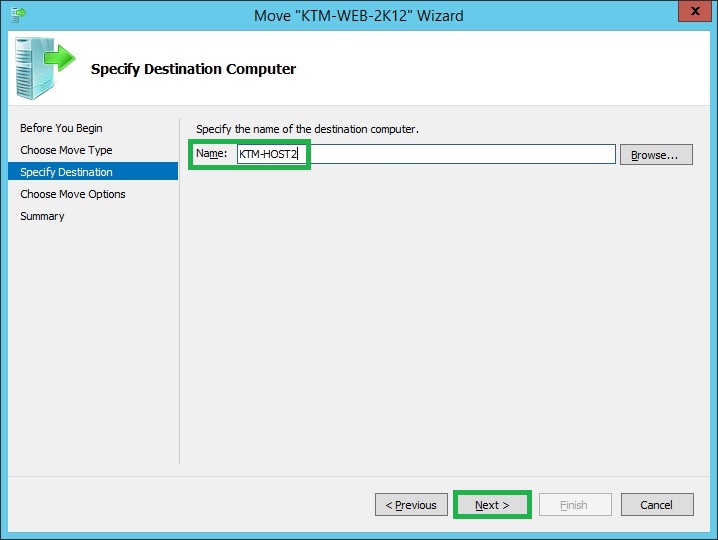
4. On the Specify Destination Computer page, in the Name field, type KTM-HOST2, and then click Next.
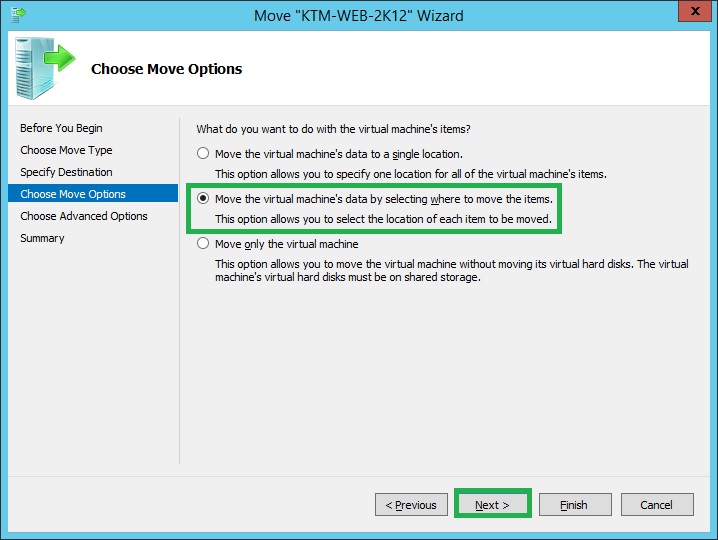
5. On the Choose Move Options page, select Move the virtual machine’s data by selecting where to move the items and then click Next.
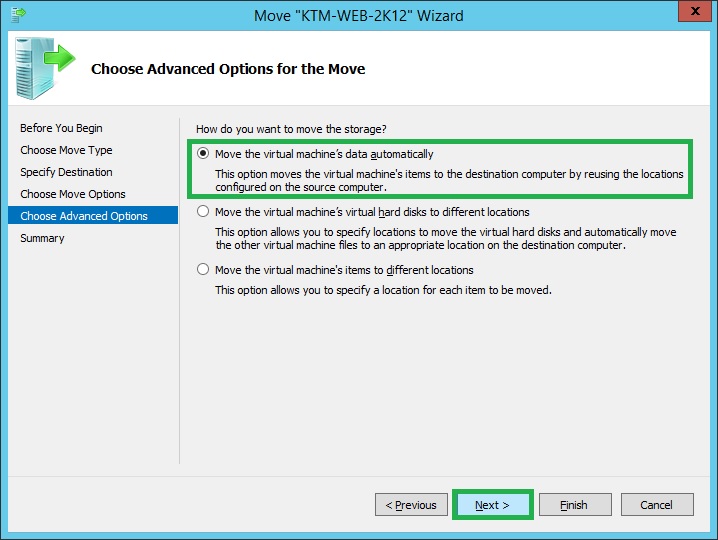
6. On the Choose Advanced Options for the Move page, select Move the virtual machine’s data automatically and then click Next.
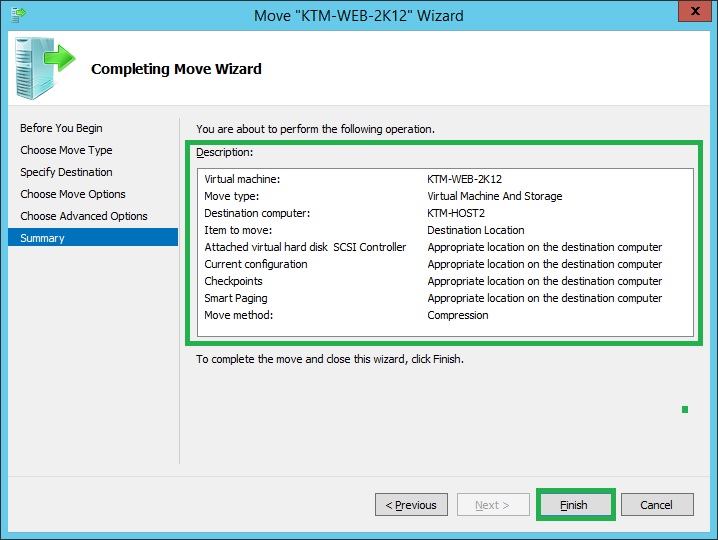
7. On the Completing Move Wizard page, Click Finish.
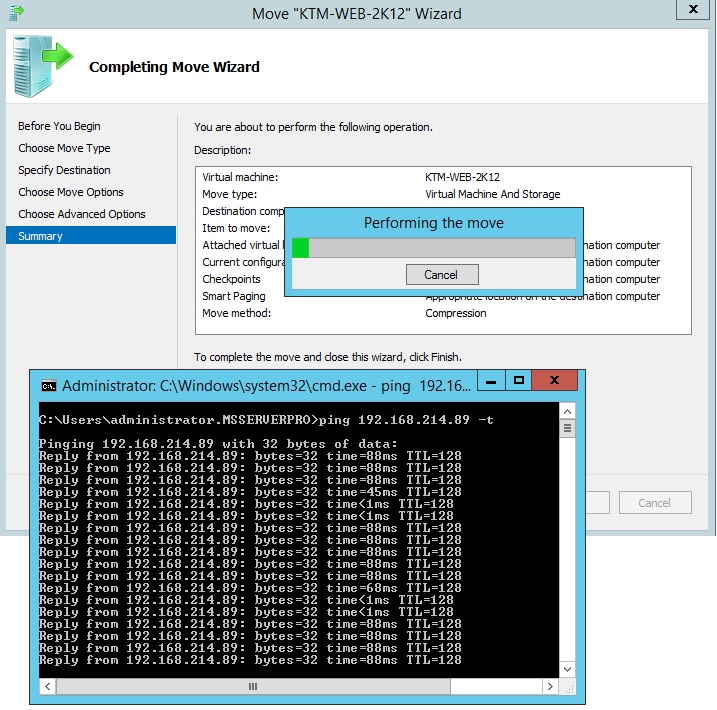
8.In the Move “KTM-WEB-2K12” Wizard, On Completing Move Wizard page, Performing the live migration. You can monitor the progress of the live migration in Hyper-V Manager, in the Status column. During the live migration, you can also able to ping KTM-WEB-2K12.

9. After live migration completes, in Hyper-V Manager, confirm that KTM-WEB-2K12 is no longer running on KTM-HOST1.
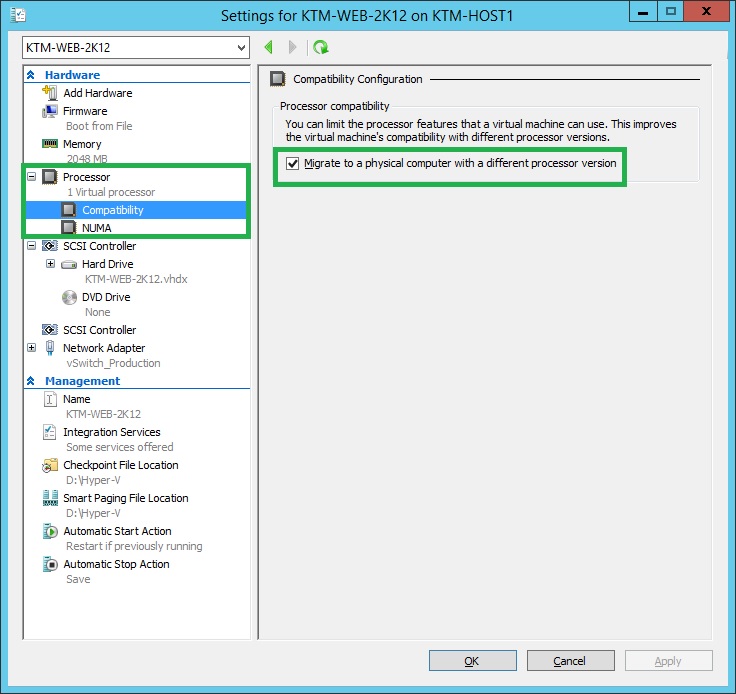
Note: If you get this error message during Live migration of VMs, you have to put check mark on Migrate to a physical computer with a different processor version as shown in figure.


Comentarios
Publicar un comentario
Dime si la información de este blog te sirvio.